| View previous topic :: View next topic |
| Author |
Message |
v8carreragts

Joined: 05 Sep 2003
Posts: 665
Location: Tucson, AZ
|
 Posted: Tue Dec 23, 2014 12:59 pm Post subject: How To Re-set Your Hatch Glass Posted: Tue Dec 23, 2014 12:59 pm Post subject: How To Re-set Your Hatch Glass |
 |
|
I took some pictures during re-setting my hatch glass so I figured that I would write up a How To.
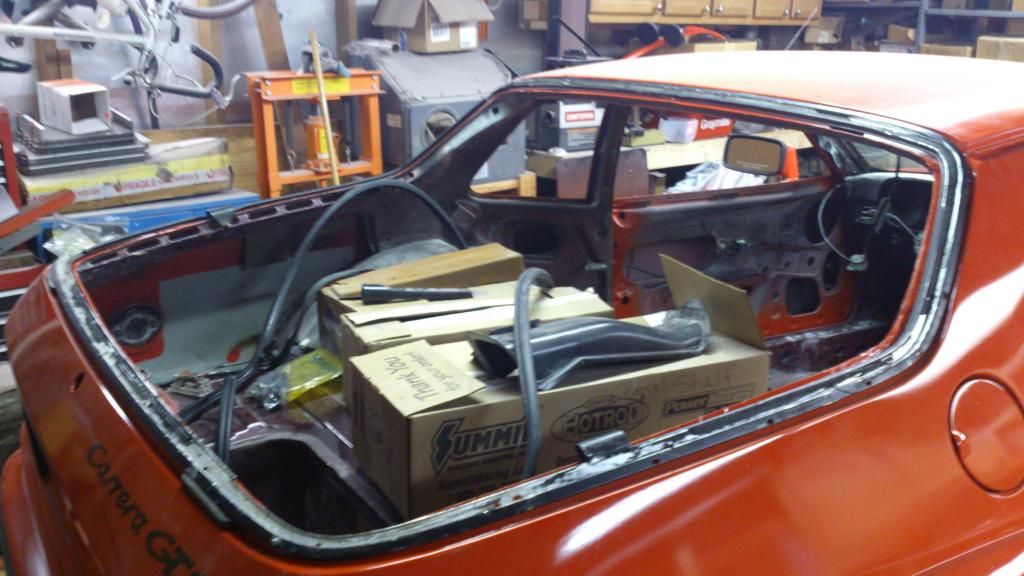
I removed the hatch glass assembly (since this is 944 I took off the spoiler first) and laid it on some boxes. My glass was de-laminated around the hinges and the lower corners so I figured it wouldn't be too difficult to cut the rest of the OEM adhesive. It turned out to be VERY difficult to cut the remaining adhesive. I used a utility knife; a narrow putty knife and a short paring knife. It took about 3 hours of cutting before I had the glass cut free.
Then I scrapped off all of the remaining adhesive from the glass and the frame. I finished the glass with a razor blade and wiped it down with lacquer thinner. After I scrapped what I could from the frame I used a round wire brush and a drill to clean the remaining bits from the frame. I wiped this with lacquer thinner as well and then re-installed it onto the car.
I bought 3M structural glass adhesive and adhesive primer for this. This adhesive is made for bonding glass into cars were the glass is used as part of the strength of the structure.
primer 08682 and Urethane windshield adhesive 08693 (e-bay 08682 $16 & 08693 $18 )
The primer is applied using a small brush. (not included with the primer) I taped the edges of the glass (on the inside) so there would be a nice straight edge. The primer is black so it will show. Be sure to use gloves for this because if you get the primer on your skin it needs to wear off-- it cannot be cleaned off with anything.
You can use a regular caulking gun to dispense the adhesive but it is very thick so it is very difficult to squeeze it out. I put a bead of about 3/8" around the frame then picked up the glass and set it in. I pressed the glass down all around and then filled all of the gaps with more adhesive. I used a small piece of cardboard to smooth the gap all around the glass so the trim will fit back on. I cleaned out the holes for the holes for the spoiler with a small screwdriver. Then I wiped the adhesive that was on the edges of the glass with a towel wet with lacquer thinner.
I needed to fold some pieces of cardboard and push them in around the frame sides and top so the glass would be level with the frame edges. The frame is very flimsy without the glass. Then I let it dry over night.
This adhesive is very difficult to cut when it is dried so it is much easier to clean up excess while it is still soft.
The glass and frame right after I cut them apart
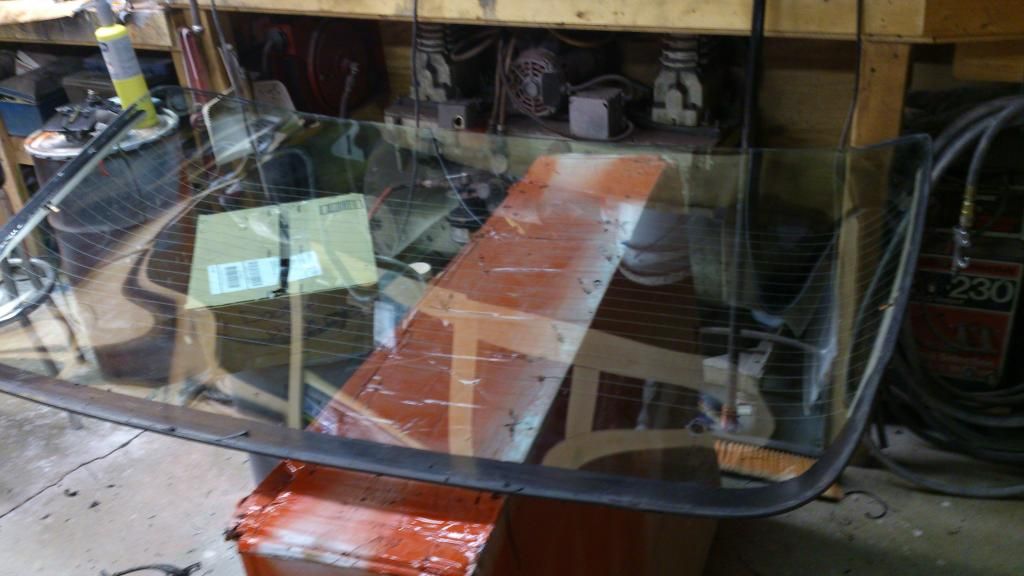
cleaned and primered
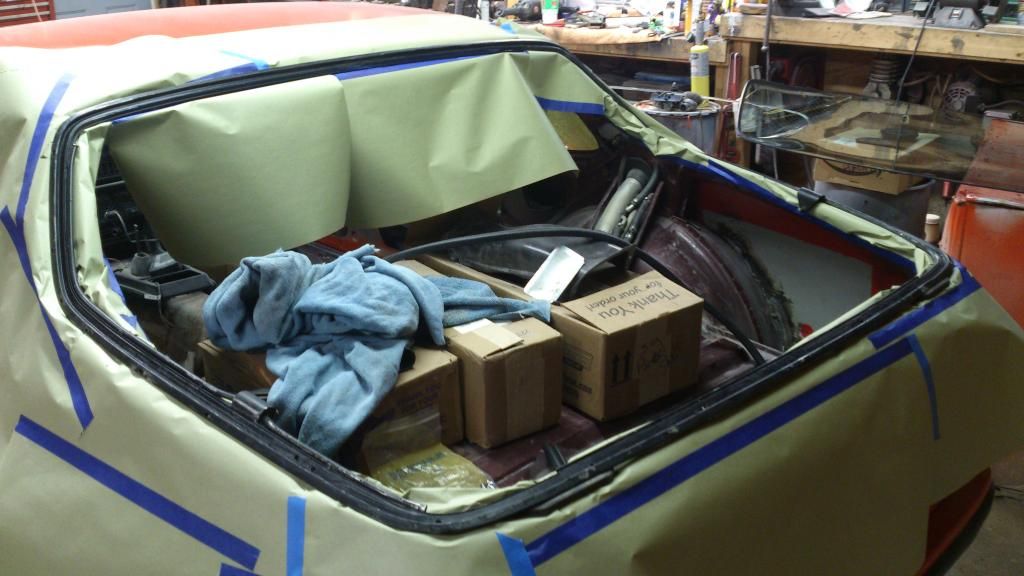

set into the frame with the edges filled and cardboard pieces

primer
adhesive

_________________
84 944--924 Carrera GTS clone w/520HP Chevy 302 V8--RUNNING!
2015 AUDI Q7
2013 Dodge Charger R/T AWD HEMI
2013 Chevy Cruze |
|
| Back to top |
|
 |
leadfoot

Joined: 11 Dec 2002
Posts: 2222
Location: gOLD cOAST Australia
|
| Posted: Sun Jan 11, 2015 2:18 pm Post subject: |
|
|
nice one, having done this with a polycarbonate hatch understand what a time consuming task this is...
used tape to mask off the hatch when doing a trial fit of the hatch in the frame, then pulled this off as the urethane went off, re taped and block sanded the frame afterwards.
during final gluing I used some hard foam blocks around the perimeter gap and weighted the hatch evenly to make sure it sat down in the frame and the hood shocks disconnected
Stu
_________________
1981 ROW 924 Turbo -
carbon fiber GT mish mash
LS1 conversion in progress... |
|
| Back to top |
|
|
|


