| View previous topic :: View next topic |
| Author |
Message |
joecitizennn

Joined: 12 Sep 2005
Posts: 2096
Location: no mans land
|
 Posted: Mon Jan 25, 2010 2:19 am Post subject: Fix rear hatch latch problems. Posted: Mon Jan 25, 2010 2:19 am Post subject: Fix rear hatch latch problems. |
 |
|
Over time the rear lid can cause us problems due to slack in the linkage, lack of lubrication or improper adjustment. It is not too hard to get it working right again with some fiddling. If you have noticed that your trunk latch motor is not opening the trunk or only opening one side, or that you have to use a lot of pressure turning the key... you probably need to try this.
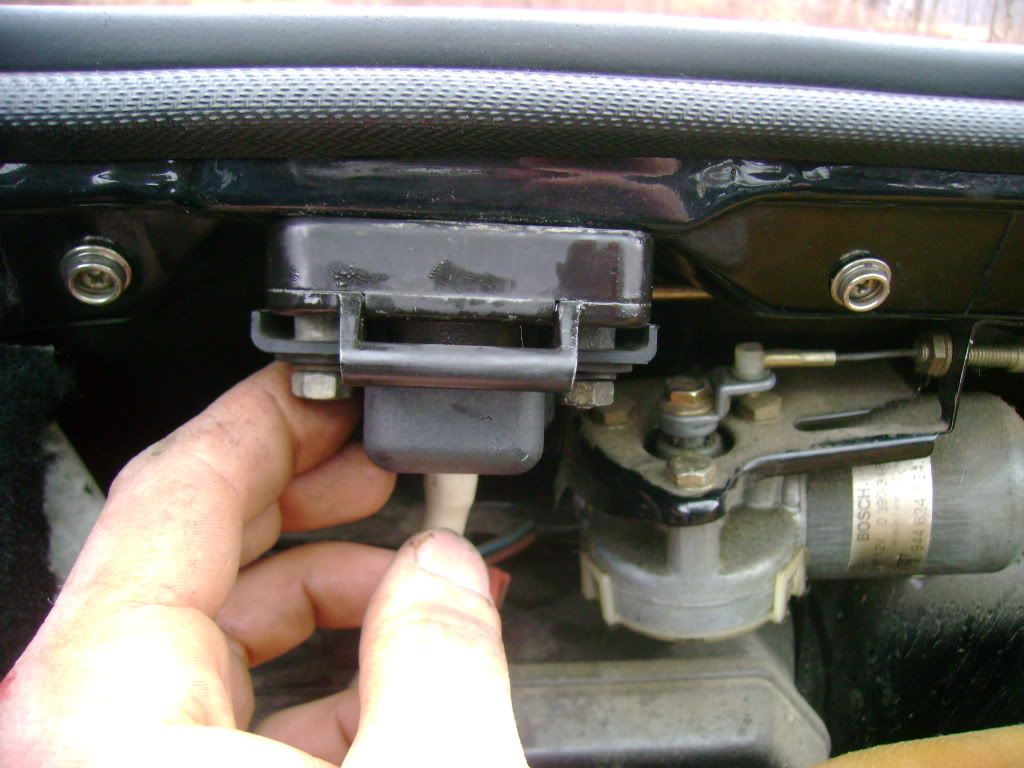
First pull back the carpet in the trunk exposing the latches. Then remove the two 10mm bolts holding each latch. On the back of the latch body there is a tiny plastic ball joint. Pop it apart with a screw driver. The latch should now come out.
Once the latch is out lubricate the jaws and lever with some type of oil and work the white plastic lever back and forth to make sure the oil is penetrating and that the mechanism is working. The jaws should close under spring pressure. Put a tiny bit of grease on the ball.
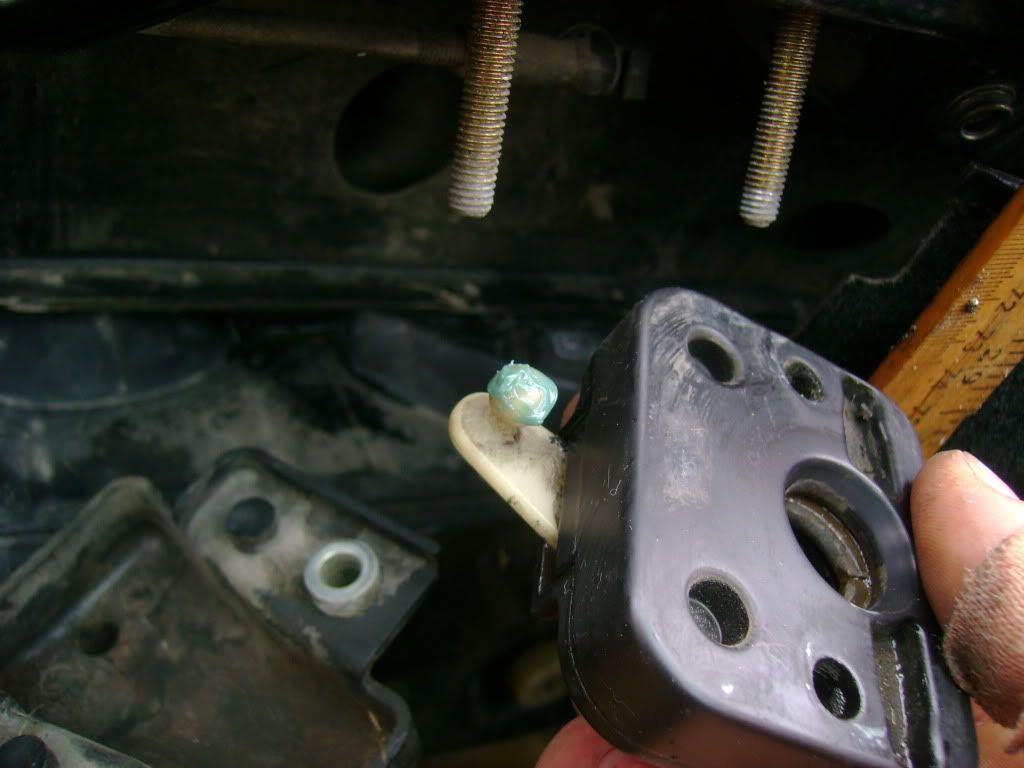
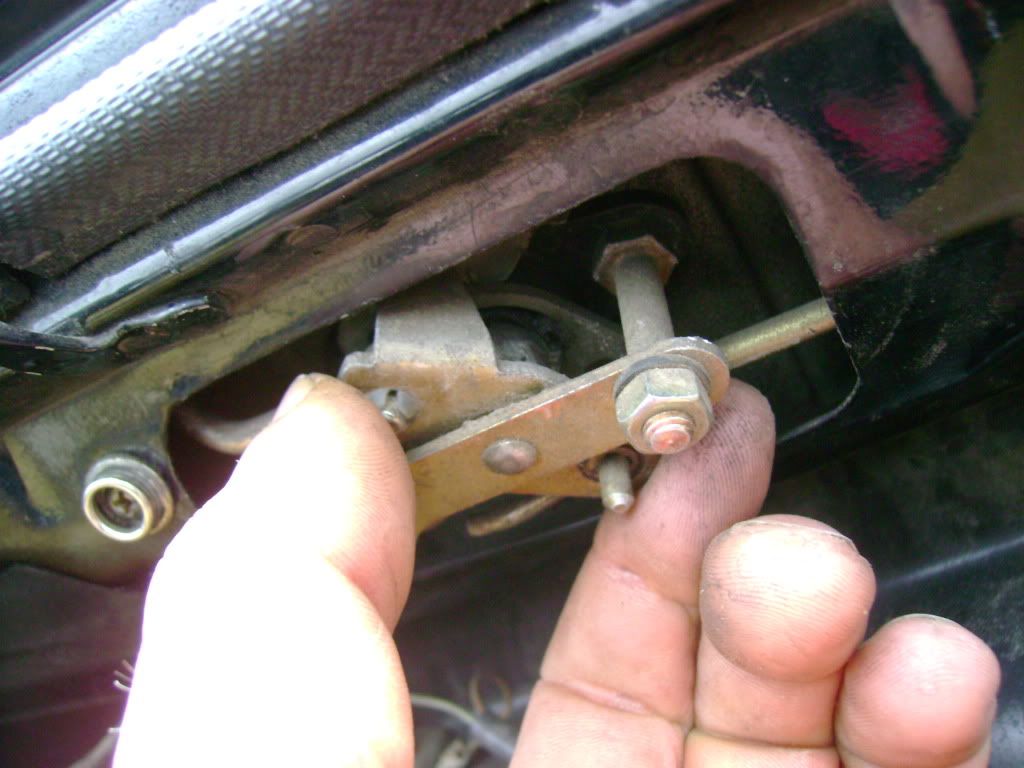
You then need to adjust the linkage on each side. This is done by turning the plastic rod end on each of the pull rods.
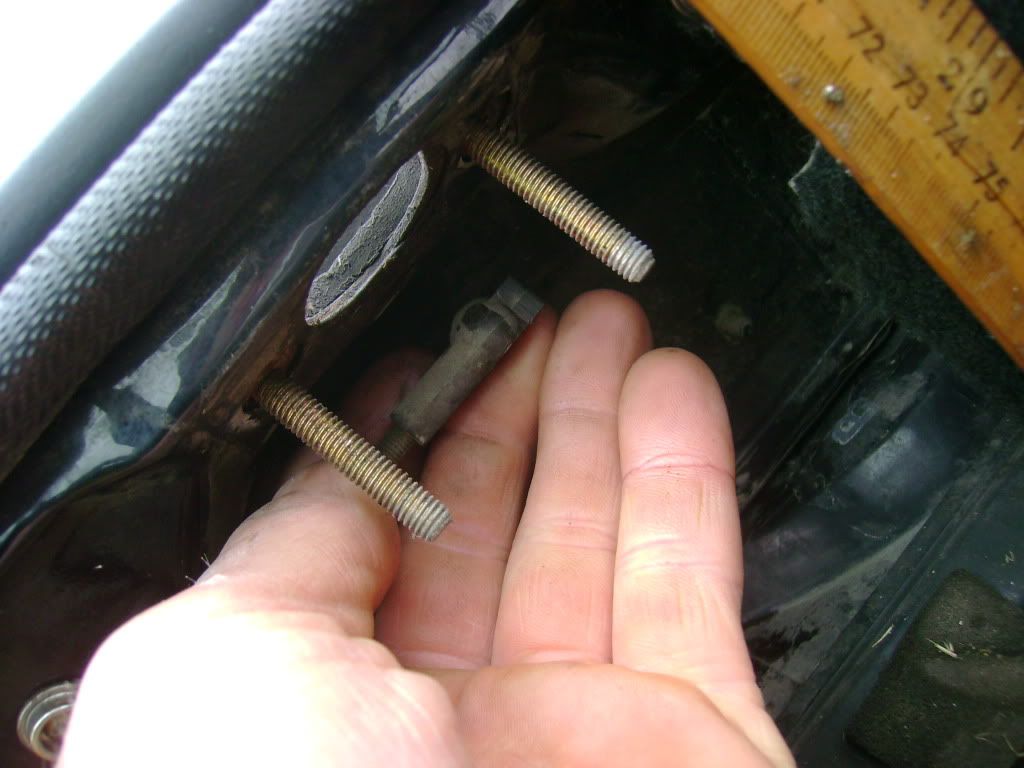
Turning the end counterclockwise will increase slack, clockwise will tighten it up. To adjust the linkage you need to make sure the rod is pulled all the way out (away from the key lock, and that the white plastic lever on the latch is disengaged, but not all the way back. Push it towards the opening position just till resistance is felt and leave it there (this eliminates a lot of slack). Line up the holes on the latch body with the studs in the trunk and see where the white ball is relative to the rod tip. Turn the rod tip until the socket is right over the ball. Do the same for the other side. My car required 5 turns on each side.
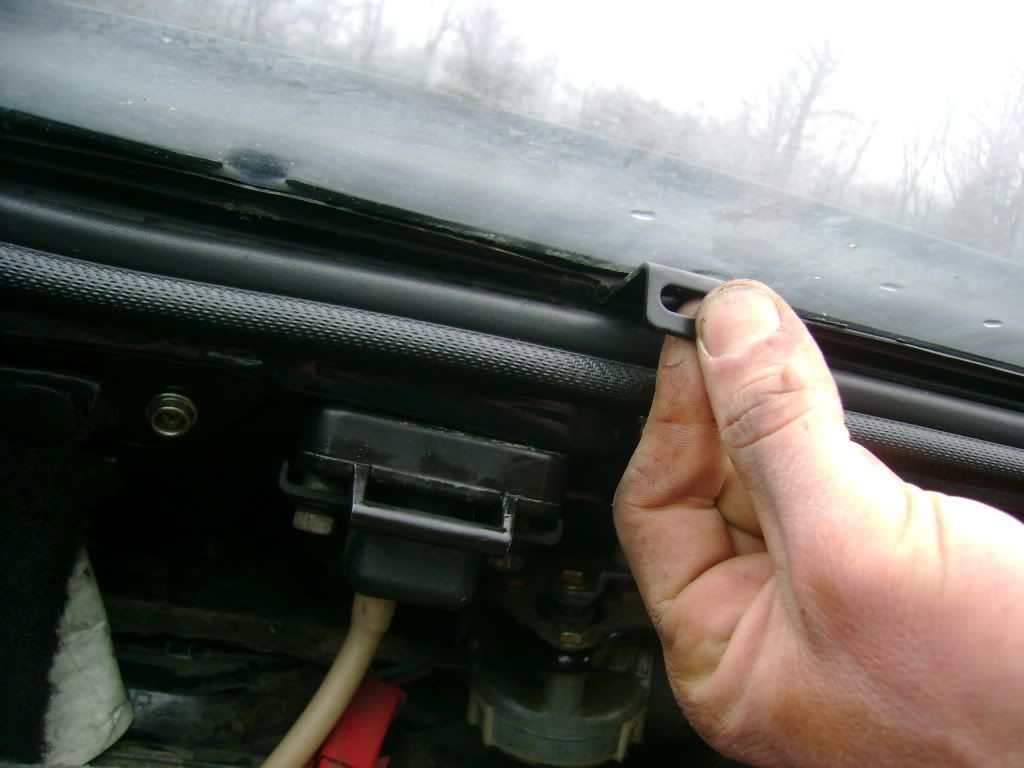
each rod tip has a plastic snap that can be opened to make assembly easier.
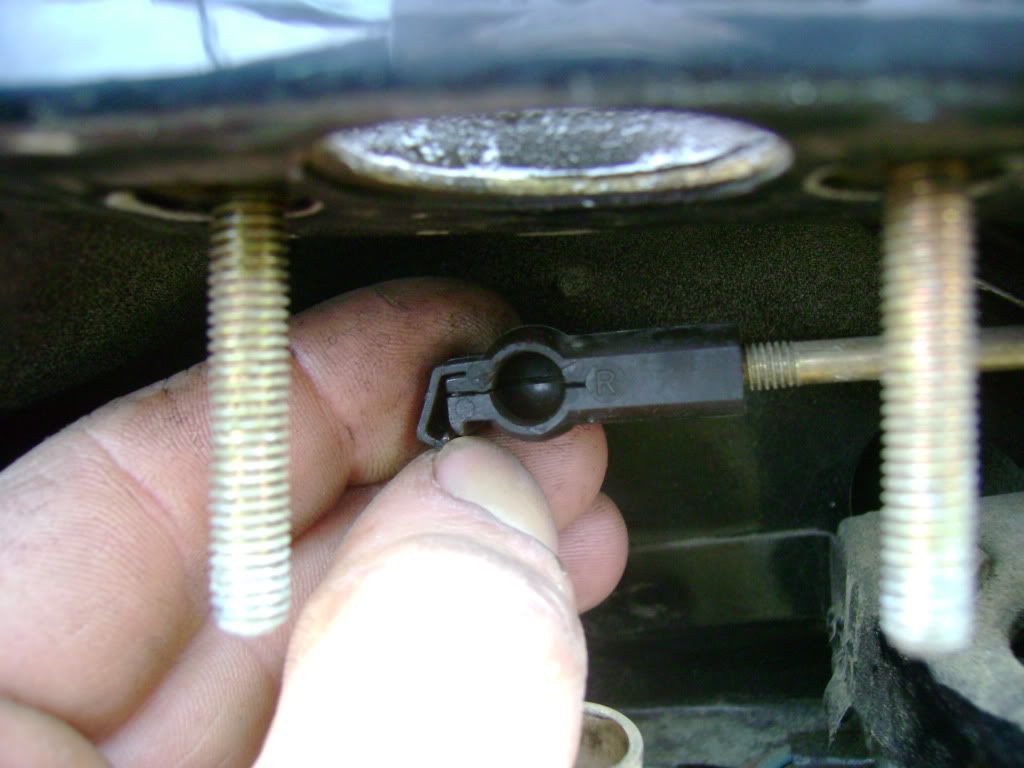
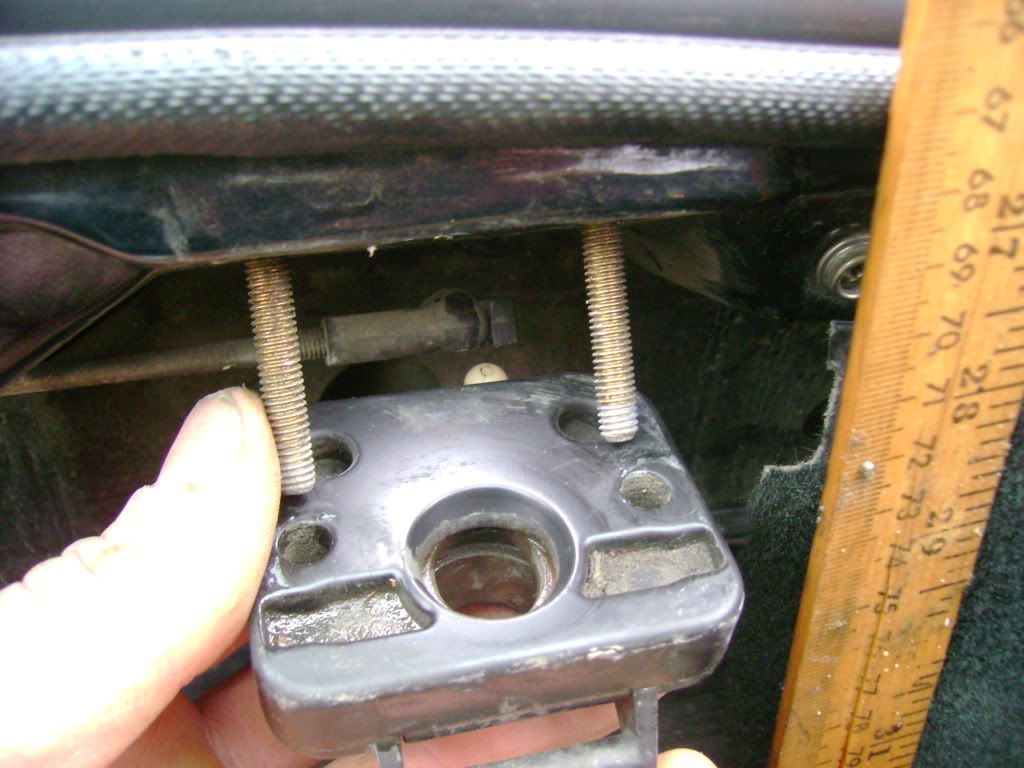
Once you have made your adjustments and removed the slack from the linkage, slide the latch up onto the studs and snap the rod tip back over the ball. If you loosened the snap on the rod tip dont forget to close it. Install the drip catch plate and hose and 10mm nuts, but dont tighten. Make sure the nuts are loose enough to move the latch body around for placement.
The next step is to set the position of the latches. I did this by gently lowering the glass hatch, but not shutting it all the way. Working from the inside of the trunk, gently pull down on the hatch while wiggling each latch body to center it. The cone shape of the stud on the hatch will center the latches. Once they are right, tighten the nuts down.
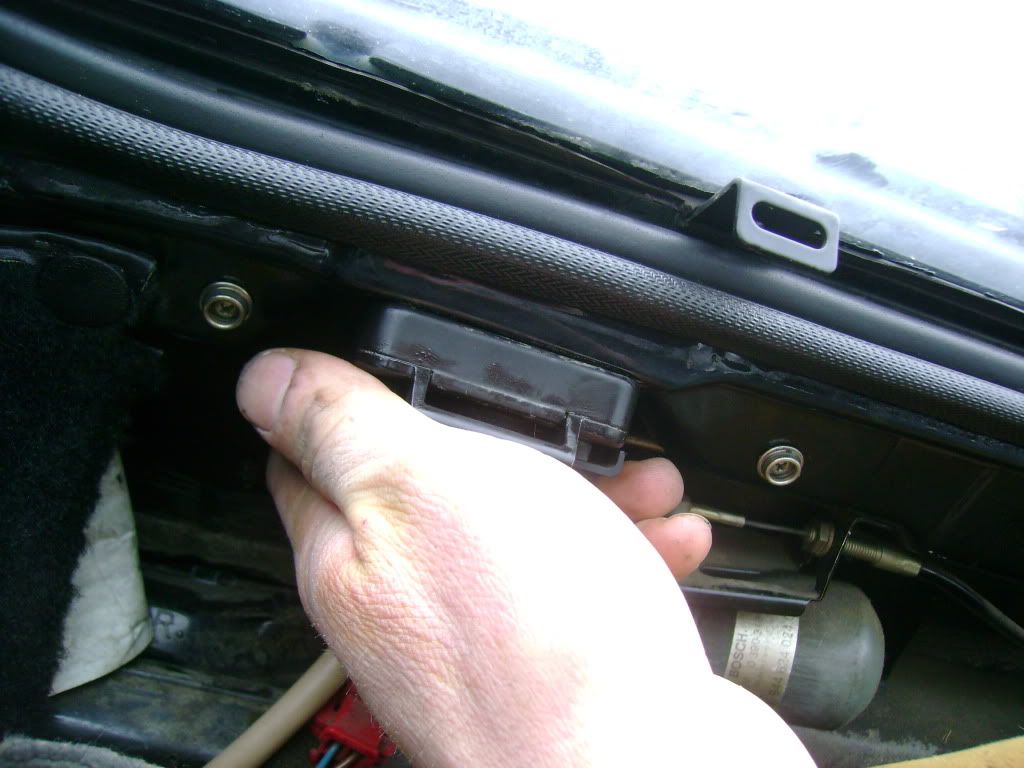
Now shut the glass hatch so it latches and try unlatching it. The linkage should turn with minimal finger pressure and unlatch on both sides at the same time.
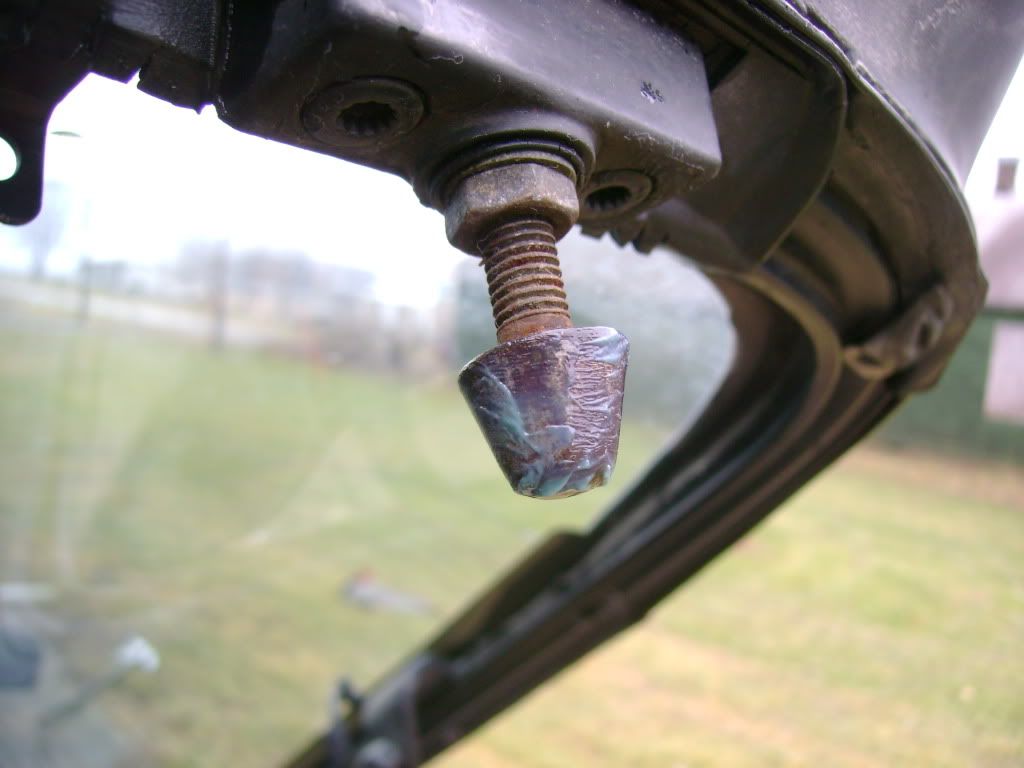
You can adjust how tightly the trunk shuts against the rubber seal by loosening the locknut around the hatch stud and turning the stud either in (tight) or out (loose).
You can lube the latch jaws with grease if you choose, but remember it can end up in your hair or on your clothes from the hatch stud when the trunk is open so less is better in this case.
Dont forget to lube the motor cable before you put the carpet back.
Remember, the latches on these cars drain water through them when it rains, so it is a good idea to oil them regularly. This can be done from the top without taking anything apart, and the drip catch will route any excess oil out the drainage tubes. |
|
| Back to top |
|
 |
ZODIAC

Joined: 08 Apr 2009
Posts: 342
Location: West Haven, Ct
|
| Posted: Thu Jan 28, 2010 3:27 pm Post subject: |
|
|
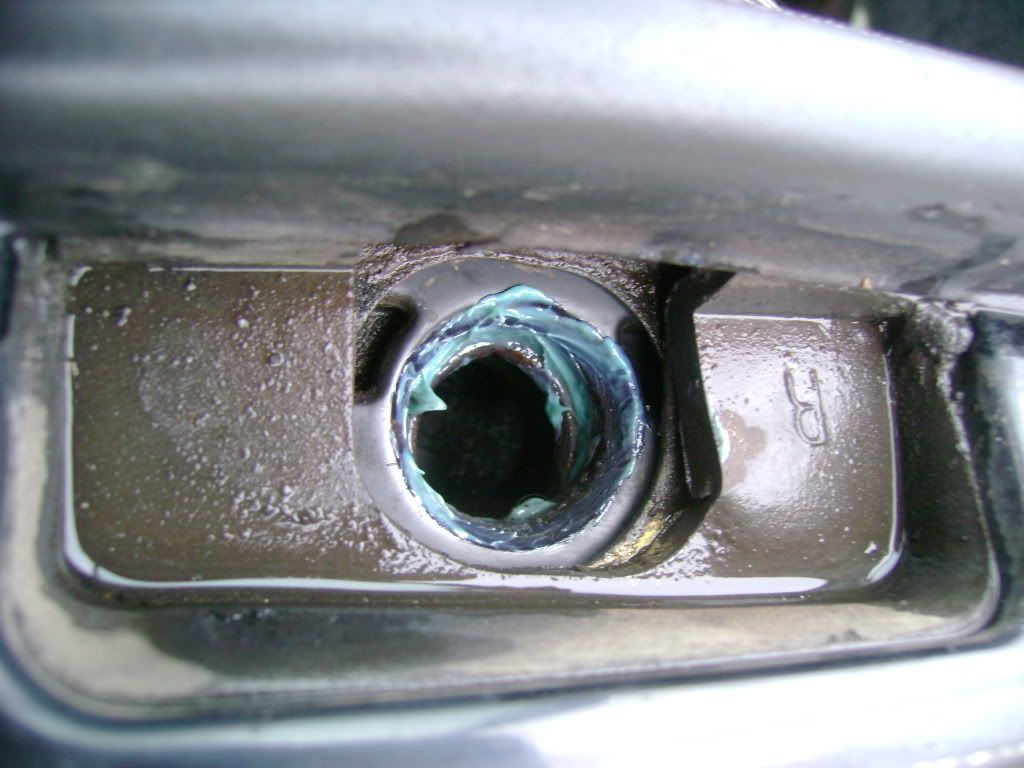
great HT! i need to fiddle with that in the spring. ol' girls under a tarp until then. quick question, the gasket in the last picture. is that available to order somewhere? it's the only reason i can think of as to why i am taking on water from the hatch area. it seems like it is allowing to much water to flow in, and i dont have that gasket there. 
_________________
"Kraut cars, they know how to build 'em".
1977 924 N/A - Red with waterdamage interior
yes...waterdamage is now a color... |
|
| Back to top |
|
|
ideola

Joined: 01 Oct 2004
Posts: 15548
Location: Spring Lake MI
|
| Posted: Thu Jan 28, 2010 8:54 pm Post subject: |
|
|
That piece in the last picture in the hatch lock recess area is actually not a gasket, it's a large block of rubber. I can see where if it was missing you would definitely be taking on tons of water. I think you can get them new, but they are EXPENSIVE. You might try sourcing one from someone who is parting out a car, just make sure they exercise care when removing, as they are a bit tough to get out without damaging them.
_________________
erstwhile owner of just about every 924 variant ever made |
|
| Back to top |
|
|
ideola
Joined: 01 Oct 2004
Posts: 15548
Location: Spring Lake MI
|
| Posted: Thu Jan 28, 2010 9:25 pm Post subject: |
|
|
@ZODIAC
FWIW, those things are called "CELL RUBBER BUFFER" and retail for $92 each for the early 924 version (part numbers 477.827.365.A & 477.827.366.A, left and right side respectively).
Now, the interesting thing is that there is a 944 part number that is listed for chassis after serial number 92FN4 00899. I don't know if the parts are interchangeable or what the difference might be, but the 944 part retails for significantly less at $31.50 per side (and interestingly is called a "HATCH LATCHING SEAL"). 944.512.365.01 & 944.512.366.01, left and right side respectively.
_________________
erstwhile owner of just about every 924 variant ever made |
|
| Back to top |
|
|
ZODIAC
Joined: 08 Apr 2009
Posts: 342
Location: West Haven, Ct
|
| Posted: Fri Jan 29, 2010 8:55 am Post subject: |
|
|
@Ideola, thanks man. i couldnt think of a way to describe that aside from a gasket! i'll start checking the part outs, adn look into the 944 one!
_________________
"Kraut cars, they know how to build 'em".
1977 924 N/A - Red with waterdamage interior
yes...waterdamage is now a color... |
|
| Back to top |
|
|
Patrick
Joined: 05 Dec 2007
Posts: 278
Location: Manila, PHILIPPINES
|
| Posted: Fri Feb 19, 2010 10:13 pm Post subject: |
|
|
Joe Citizennn- Fantastic How To! exactly what i`ve been needing to straighten out my rear hatch locking issues. Much Thanks!
_________________
1979 924 U.S. version
Single sidedraft Weber 40 |
|
| Back to top |
|
|
Thyperson

Joined: 11 Aug 2009
Posts: 35
Location: Wisconsin Rapids, WI
|
| Posted: Mon Mar 15, 2010 7:40 am Post subject: |
|
|
Thanks for the How-to. I can now open my hatch again! 
_________________
79' 924 Gorilla Mobile |
|
| Back to top |
|
|
camfella
Joined: 20 Jul 2010
Posts: 42
Location: Ottawa - Canada
|
| Posted: Wed Sep 01, 2010 7:54 am Post subject: |
|
|
thanks for the great walk through, definitly on the list of things to do!
Cheers!
_________________
1987 924s |
|
| Back to top |
|
|
!tom

Joined: 28 Aug 2006
Posts: 1934
Location: Victoria, BC Canada
|
| Posted: Sat Sep 11, 2010 11:19 am Post subject: |
|
|
From what I've seen, adjusting the hatch studs as described doesn't work. On my hatches, the stud is held captive in the piece attached to the hatch with a head, and the nut is there to secure the pin to the hatch, not to adjust how far down the pin hangs.
It's a bit annoying as one of mine is a bit too long and the other a bit too short, and this method of adjusting doesn't do the trick.
Could these be different for different years? I've looked at the hatch that was on my '78, pieces from a '78 parts car, and a hatch (on my car now) from an unknown-year 931.
_________________
78 924 NA
5-lug |
|
| Back to top |
|
|
ideola
Joined: 01 Oct 2004
Posts: 15548
Location: Spring Lake MI
|
| Posted: Sat Sep 11, 2010 7:54 pm Post subject: |
|
|
Tom, are you sure? Did you loosen the lock nut? If you don't, the hatch pins will just spin, but if you loosen the lock nut, you should be able to adjust the pin length. There should be a slot in the end of the pin for a large screwdriver. Use this to keep the pin from spinning, and then break loose the lock nut. Then turn the pin in to shorten or out to lengthen.
_________________
erstwhile owner of just about every 924 variant ever made |
|
| Back to top |
|
|
nwns

Joined: 27 Sep 2008
Posts: 93
Location: Lancashire, UK
|
| Posted: Sat Sep 11, 2010 8:35 pm Post subject: |
|
|
Buy the 944 parts, pins, clasp, rubbers the lot. They fit just fine and are much better
_________________
Pete |
|
| Back to top |
|
|
TheChrisSummers
Joined: 05 Sep 2010
Posts: 7
Location: Medina, Ohio
|
| Posted: Sat Oct 16, 2010 9:59 am Post subject: |
|
|
great how-to, thanks for your time and effort now i don't have to sit there and try to force my trunk open for 10 minutes!
_________________
1987 Porsche 924
Will never buy another car besides a Porsche |
|
| Back to top |
|
|
Crash613
Joined: 12 Apr 2016
Posts: 12
Location: Toledo, OH
|
| Posted: Mon Jun 11, 2018 4:17 am Post subject: |
|
|
| That is a great write-up. I'm not sure if it applies to me or not. Maybe you can help. When I use the key the hatch opens fine. When I press the button in the footwell I can feel the motor running and it sounds like it should open but it does not. Will making these adjustments affect my problem? |
|
| Back to top |
|
|
Crash613
Joined: 12 Apr 2016
Posts: 12
Location: Toledo, OH
|
| Posted: Wed Aug 29, 2018 1:01 am Post subject: |
|
|
| Crash613 wrote: | | That is a great write-up. I'm not sure if it applies to me or not. Maybe you can help. When I use the key the hatch opens fine. When I press the button in the footwell I can feel the motor running and it sounds like it should open but it does not. Will making these adjustments affect my problem? |
Did you ever sort this? I just fixed mine |
|
| Back to top |
|
|
Tobydunk
Joined: 12 Oct 2019
Posts: 1
Location: Isle of Wight UK
|
| Posted: Sun Oct 13, 2019 6:54 pm Post subject: |
|
|
| That was a great help, thanks. Once I had done the work I got my wife to lower the boot whilst I was in it, and put some weight on it (no comments please) and that self centred the catches . Tightened up and bingo!!!! Time to get the next snag done. |
|
| Back to top |
|
|
|

