 |
924Board.org
Discussion Forum of 924.org
|
| View previous topic :: View next topic |
| Author |
Message |
Peter

Joined: 04 Nov 2002
Posts: 379
Location: New York, NY
|
 Posted: Sat Dec 16, 2006 5:09 pm Post subject: How To Install a Functioning Hood Scoop Posted: Sat Dec 16, 2006 5:09 pm Post subject: How To Install a Functioning Hood Scoop |
 |
|
This is a write-up on how to measure and mark a hood for the installation of a functioning hood scoop. However, it applies to any situation where you have to cut a hood, door etc to precise measurements when you cant access the accessory behind the panel while you are cutting.
Step One:
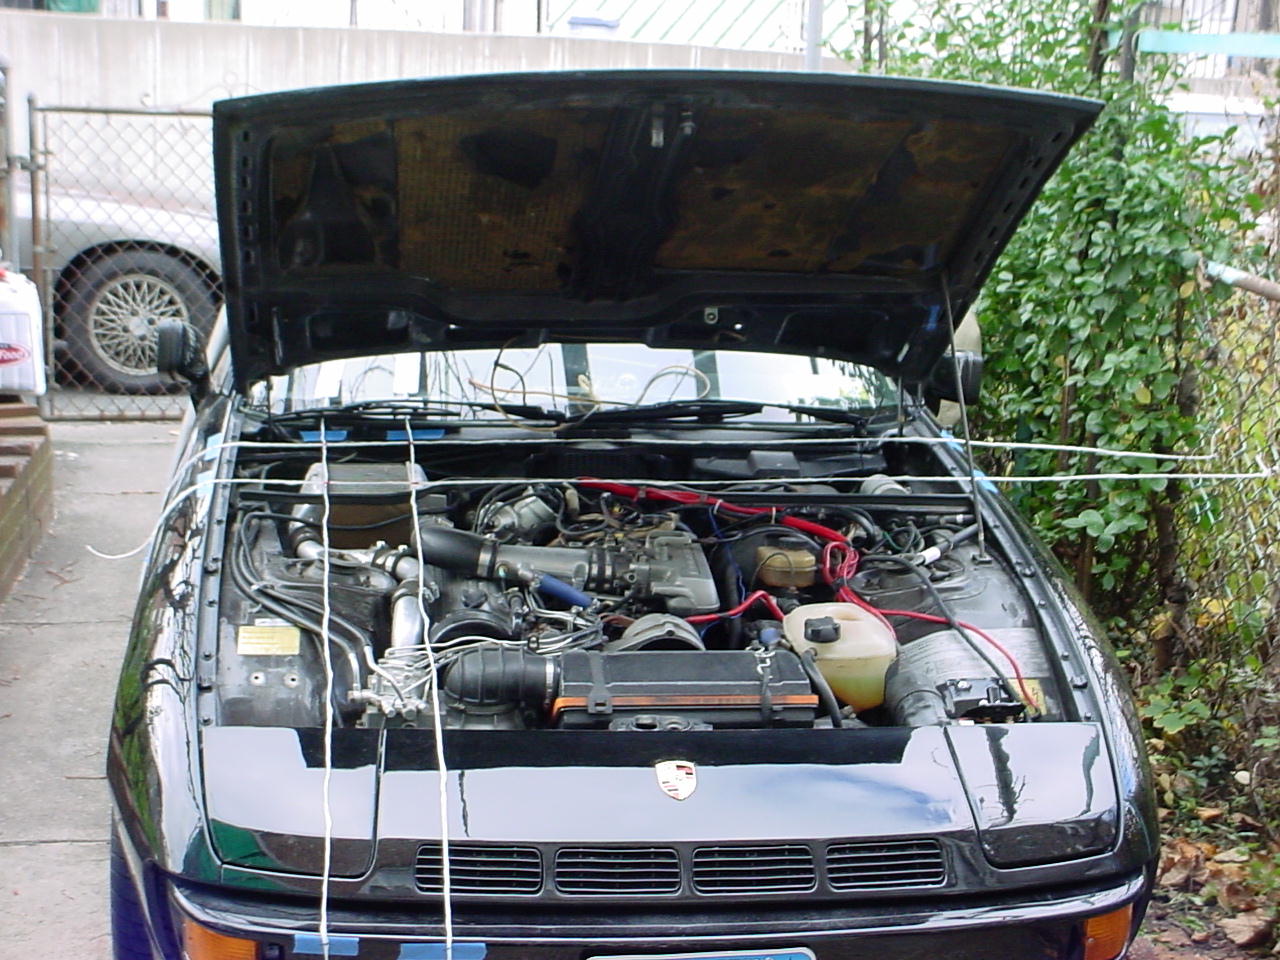
The accessory must be mounted in a fixed location. Here, the IC was already installed.
Step Two:
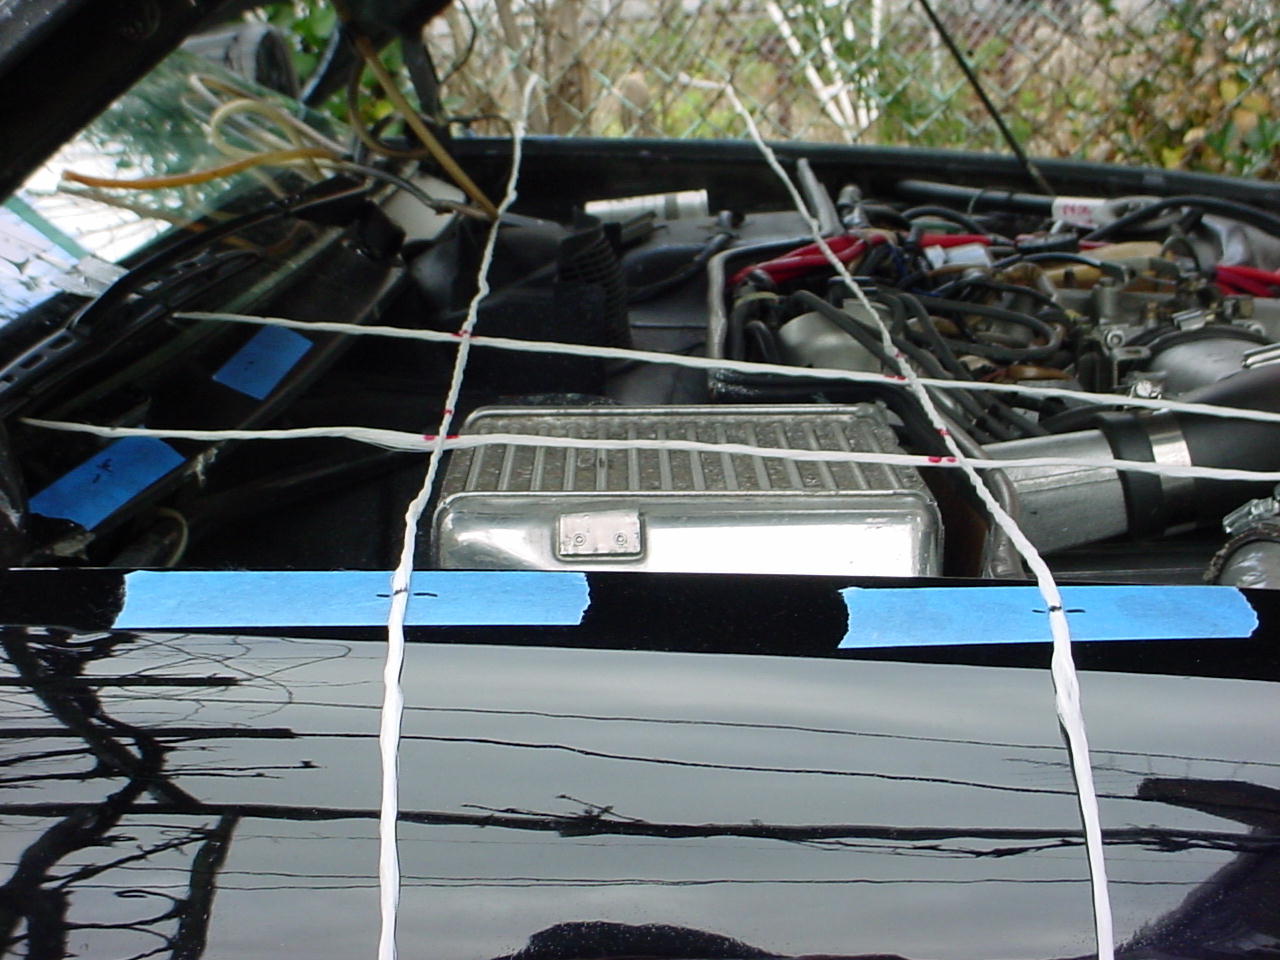
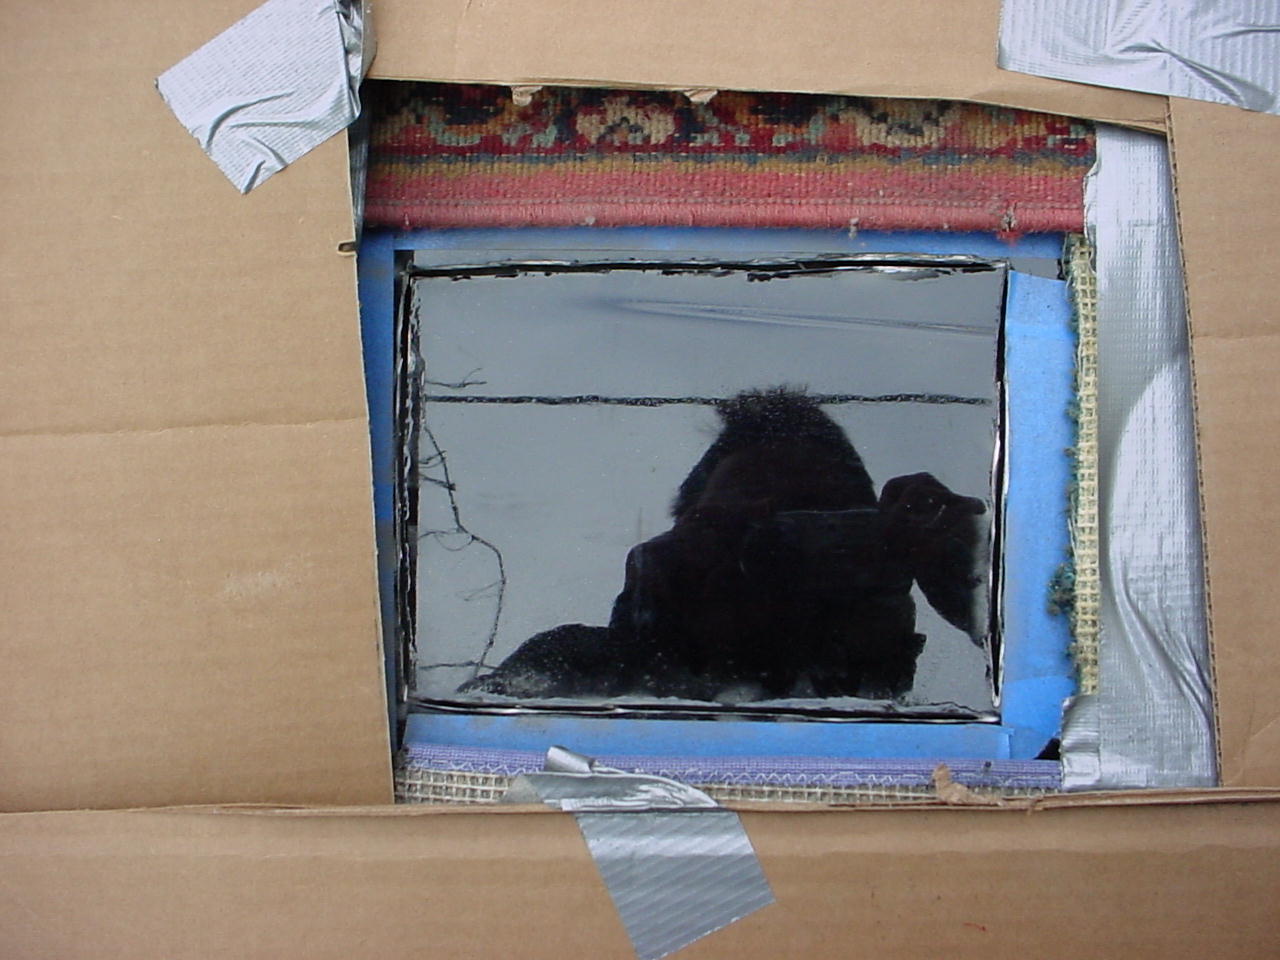
Open the hood (or door, etc) and run twine/string to act as plum lines. As per the PIC below, four pieces of twine run North, South, East & West, interesting at each of the four corners of the IC. Mark each corner of the twine as it intersects the IC with a mark. As per the pics, I used red paint.
Step Three:
Use two pieces of tape at each end of the twine. One piece of tape is used to hold down the twine to the car. Pull the twine tight, and tape it to the car. The other piece of twine is the marker. It is placed under the twine (next to the hold-down piece of tape) and is used to mark the location of the twine as it lies across the tape. As per the pic bleow, the blue tape and the twine have both been marked with a black pen mark across them. [The rational is that after the twine is removed, the hood is closed, and the twine is re-stretched over the hood, with the black pen marks marking the exact location at which the twine was originally placed and therefore indicating the exact location of the IC as per the red marks in Step Two above. Read on, it gets clearer.
Step Four:
Make sure that each end of twine has marker tape and is properly marked. Verify that the hold-down tape has not allowed the twine to slip: this will cause your markings to be off and you will not be cutting above the IC.
Step Five:
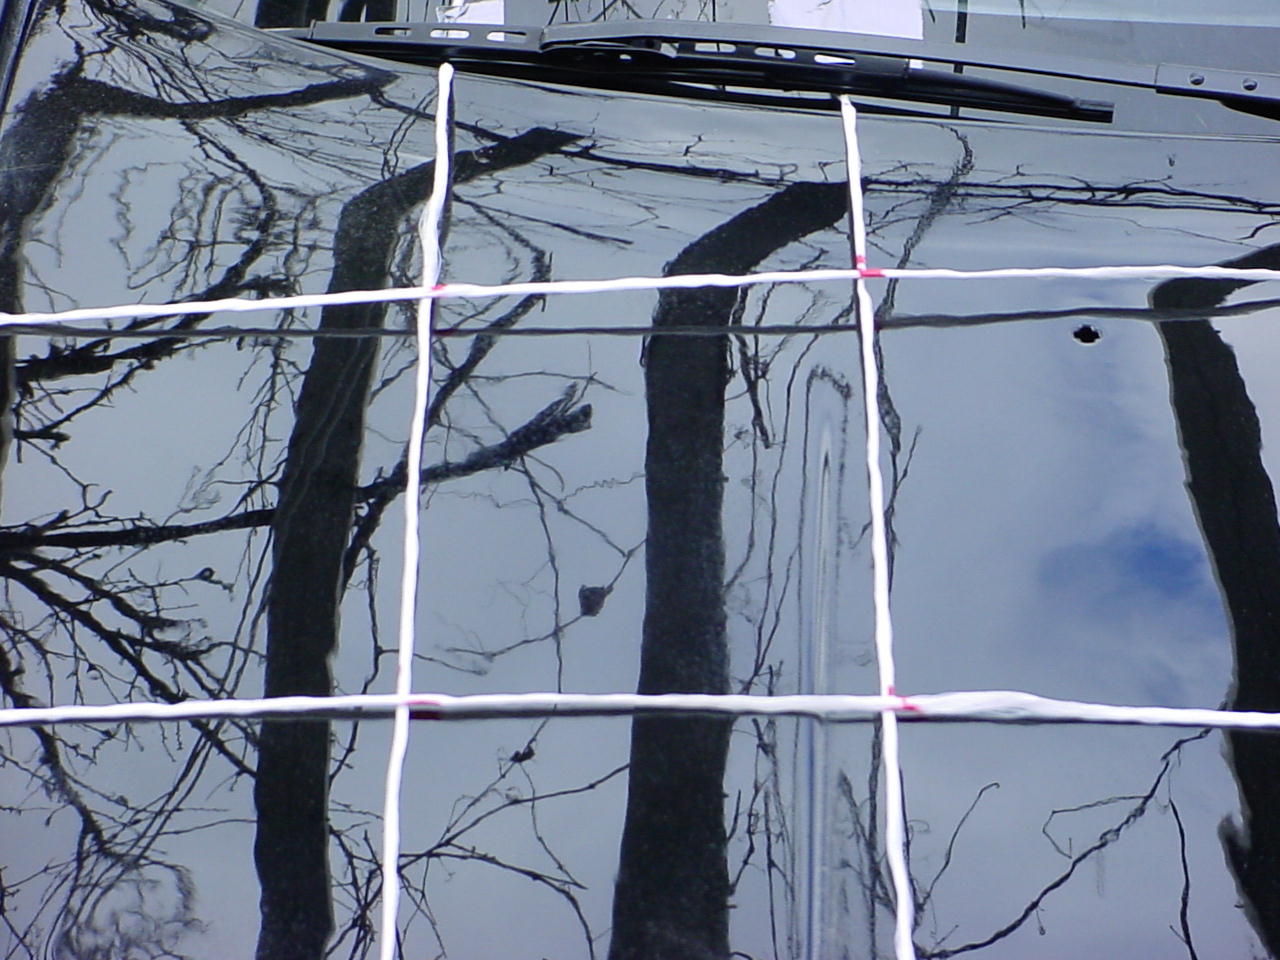
Remove only one piece of hold-down tape from each piece of twine, leaving the other side hold-down tape in place. Move the twine aside and close the hood. Then reattach the twine to the hold-down tape at the location it was prevoulsy removed from. The marker tape has a black pen mark. Just align the black pen mark on your marker tape to the black pen mark on the twine. The red marks that designated the exact location of the IC should match up on the closed hood. It will not be perfect, because the closed hood adds some height to throw of the markings by 2mm or so.
Step Six:
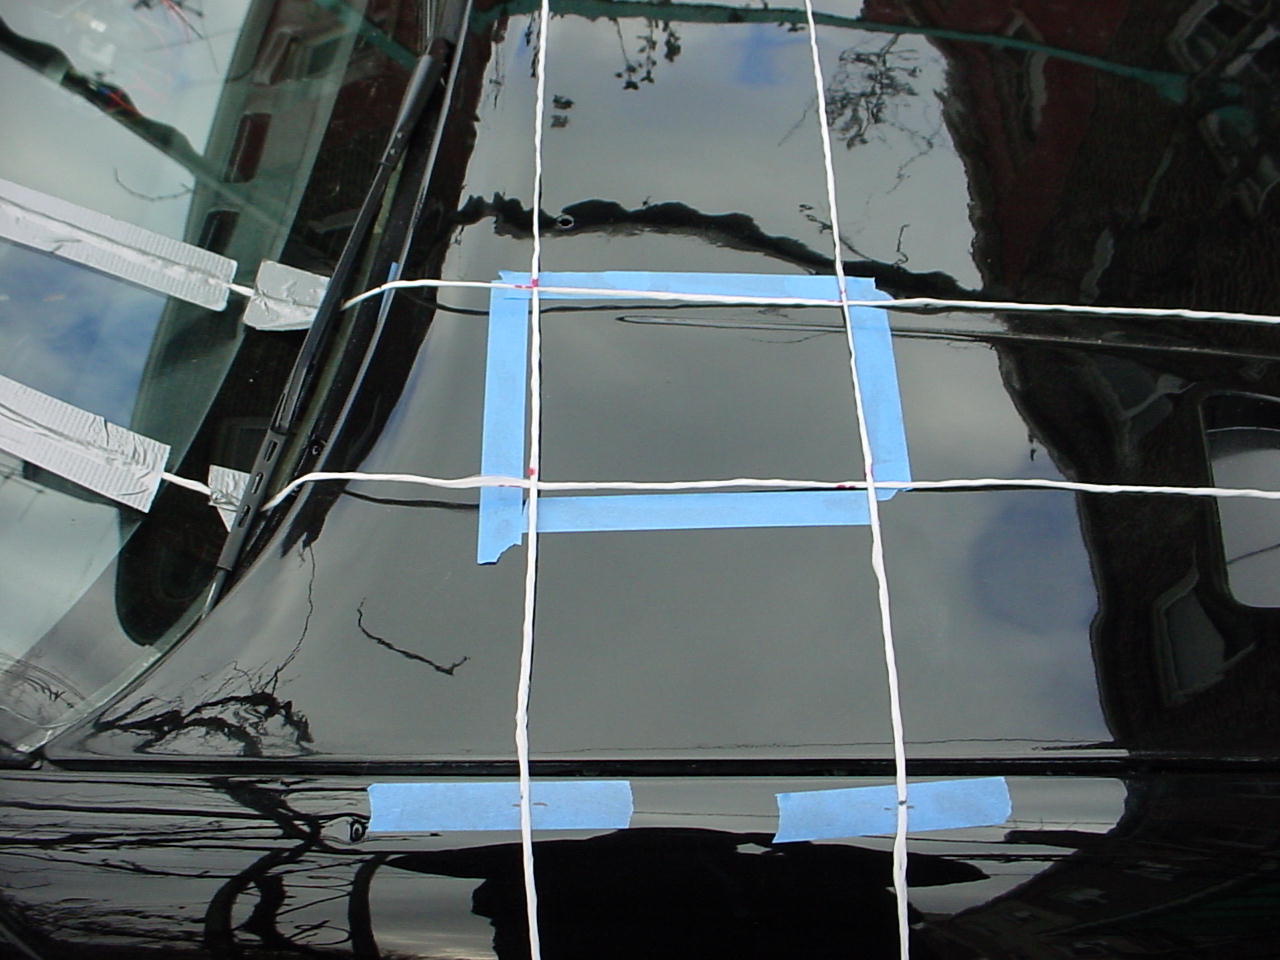
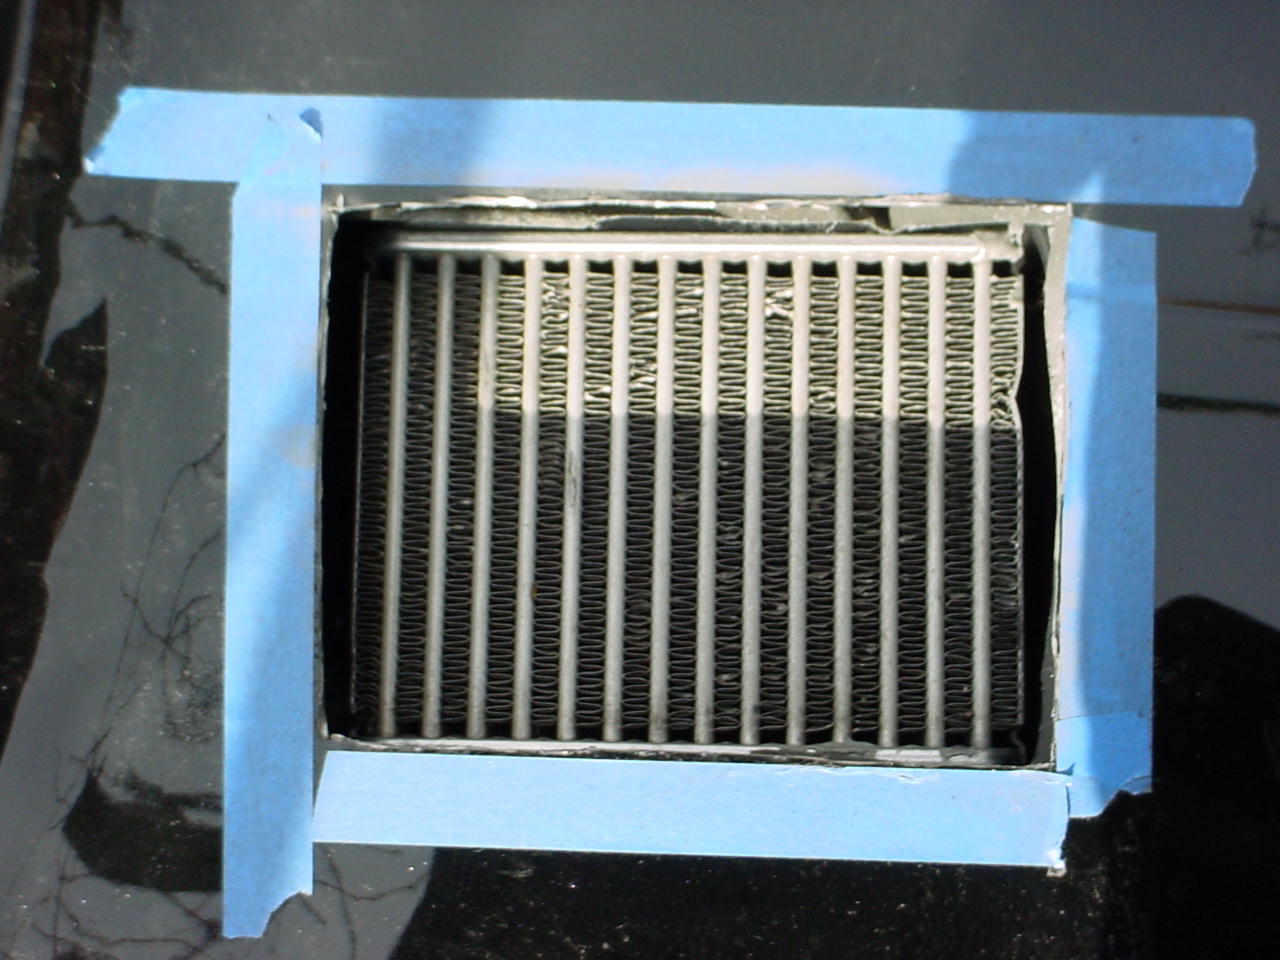
Mark the area to be cut with tape.
Step Seven:
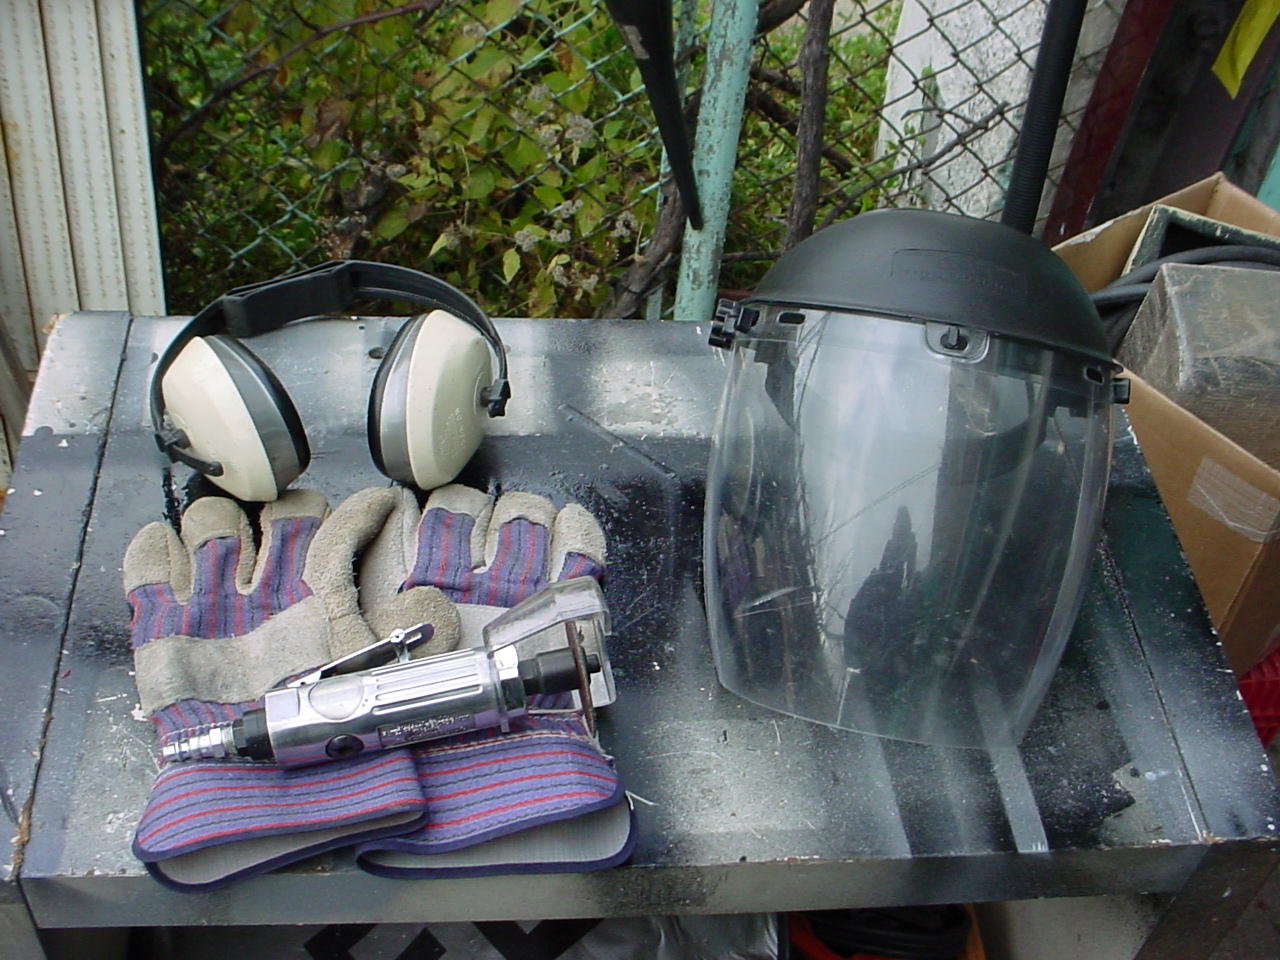
Protect the rest of your car from cutting shavings. Also, place a metal plate or other suitable metal under the hood in the area where you will be cutting to protect the IC and other engine parts from accidentally being cut.
Step Eight:
Use proper tools and proper safety procedures. I found that a pneumatic die cutter with 3.5 cutting disc for metal works best. Dont forget gloves, ear and face protection.
Step Nine:
Say a prayer (hey, it cant hurt) and do the cutting. When you are finished, you have a nice hole.
Step Ten:
Trial fit your hood scoop by laying it over the opening.
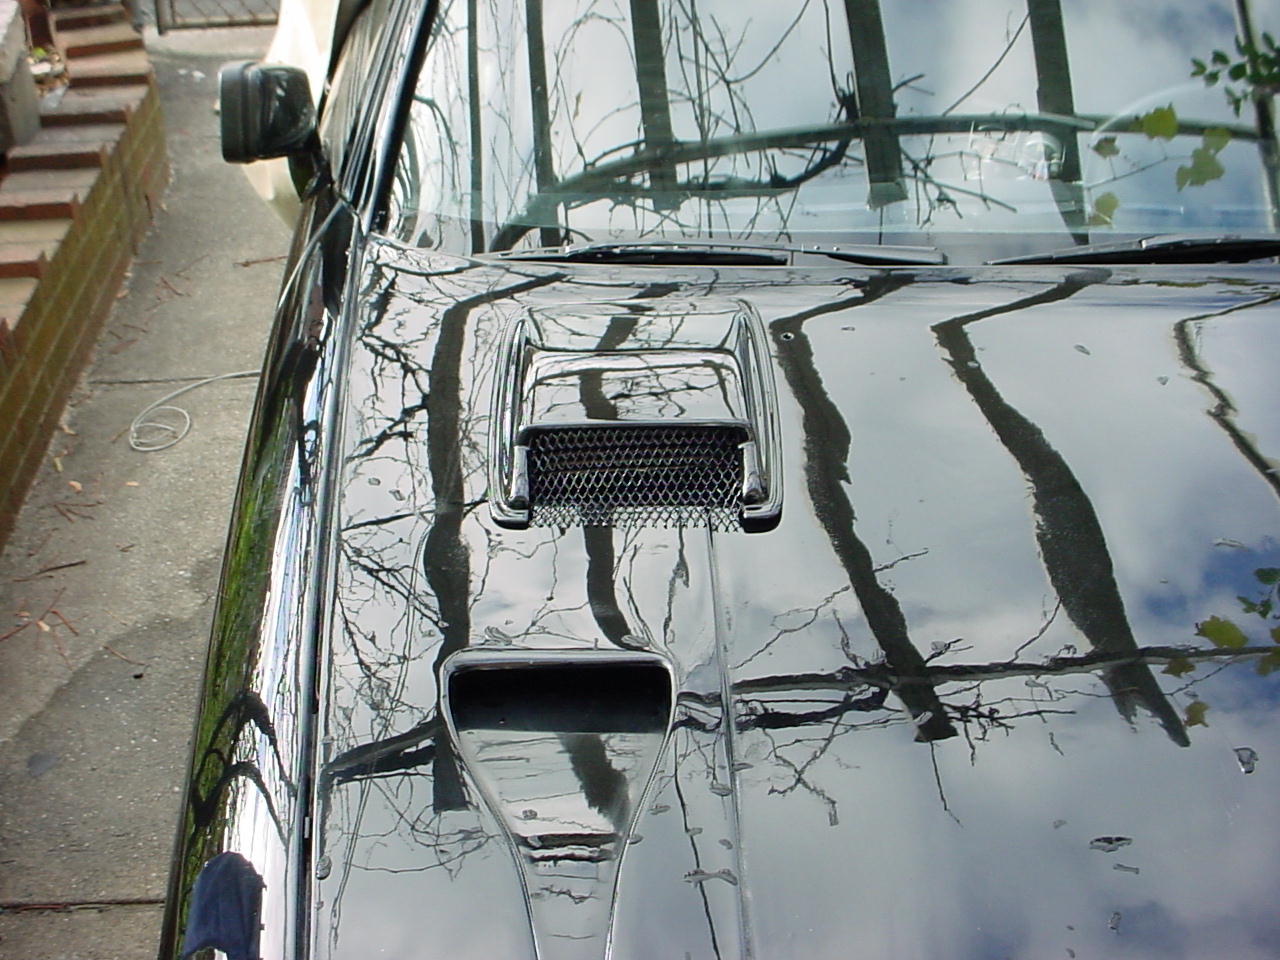
Step Eleven:
Mount your hood scoop, with glue, bolts, double stick tape, etc.
I chose bolts, which I painted at the same time I painted my hood scoop.
The finished product can be seen at http://www.924board.org/viewtopic.php?t=19266&postdays=0&postorder=asc&start=75
Enjoy, and dont be afraid to experiment with your car.
Last edited by Peter on Mon Dec 18, 2006 7:54 am; edited 1 time in total |
|
| Back to top |
|
 |
Peter_in_AU

Joined: 29 Jul 2001
Posts: 2743
Location: Sydney, Australia
|
| Posted: Sun Dec 17, 2006 12:05 pm Post subject: |
|
|
WOW!! Peter that is great! Thanks.
_________________
1979 924 (Gone to a better place)
1974 Lotus 7 S4 "Big Valve" Twin-cam (waiting)
1982 924 (As featured on Wikipedia)
Learn to love your multimeter and may the search be with you |
|
| Back to top |
|
|
Peter
Joined: 04 Nov 2002
Posts: 379
Location: New York, NY
|
| Posted: Mon Dec 18, 2006 7:53 am Post subject: |
|
|
| Peter_in_AU wrote: | | WOW!! Peter that is great! Thanks. |
Just trying to do my part for the Board.  |
|
| Back to top |
|
|
endwrench

Joined: 07 Dec 2002
Posts: 1631
Location: Victor, Montana
|
| Posted: Mon Dec 18, 2006 12:47 pm Post subject: |
|
|
Hey, great idea with the strings! Simple but effective. Could have used the knowledge in the past. Still, it had to be a little scary cutting into that pretty new paint 
BTW, the scoop looks much better than I imagined it would.
Todd
_________________
'79 924NA. Rebuilt 9.5:1, MSDS header, Mega Squirt Injection, MJLJ-EDIS Ignition, 1.6L Whipple Charger and Intercooler, 10lbs Boost, 944 Trans, Custom HD Clutch.
"simsport" said....superchargers are better than turbos its official!.... |
|
| Back to top |
|
|
Peter
Joined: 04 Nov 2002
Posts: 379
Location: New York, NY
|
| Posted: Wed Dec 20, 2006 4:08 pm Post subject: |
|
|
| endwrench wrote: | BTW, the scoop looks much better than I imagined it would.
Todd |
Todd,
O ye of little faith. I wouldnt have posted pics if the hood scoop came out badly. 
Seriously, it wasnt scary cutting the hood. I did my measuring (measure twice cut once) and knew how it would turn out. But, more importantly, its just a physical possession that can be replaced. One cant be afraid to learn by trying new things. |
|
| Back to top |
|
|
Ozzie

Joined: 12 Mar 2005
Posts: 4448
Location: Townsville, Qld. Australia
|
| Posted: Wed Dec 20, 2006 7:17 pm Post subject: |
|
|
Looks good.
You can't jump a gorge in 2 hops. Take a big leap if its neeeded.
_________________
Porsche 924 1984 (UK import) NA
Its AUTO and its BLACK
Montego Black on black/red
Engineer of Electro/Mechanical Systems Maintenance |
|
| Back to top |
|
|
|
|
You cannot post new topics in this forum
You cannot reply to topics in this forum
You cannot edit your posts in this forum
You cannot delete your posts in this forum
You cannot vote in polls in this forum
|
Powered by phpBB © 2001, 2005 phpBB Group
|

