 |
924Board.org
Discussion Forum of 924.org
|
| View previous topic :: View next topic |
| Author |
Message |
joecitizennn

Joined: 12 Sep 2005
Posts: 2096
Location: no mans land
|
 Posted: Sat Sep 03, 2011 3:38 am Post subject: The 20 dollar rack rebuild. Posted: Sat Sep 03, 2011 3:38 am Post subject: The 20 dollar rack rebuild. |
 |
|
Leaking power steering racks are an all too common problem with our cars. If you own a 924s or a 944, you have either replaced, had rebuilt or rebuilt your steering rack... or you will. Rack rebuild kits are not hugely expensive but they certainly are not free, and the irony is that most racks experience failure from just two seals. These seals being the two outer rack wiper seals. I am not saying that the other seals and o rings dont fail, because they certainly can and do, but 9 times out of ten a 944 rack begins to drip from a worn lip on one or both wiper seals.
The following is a description of my last rack repair job. My only hope is that it might save you a few dollars and shed some light what is going on in there. This is my third rack repair and they have all been successful. At least none of them have leaked yet. My oldest one is going on 4 years and 30k miles and still dry as a bone.
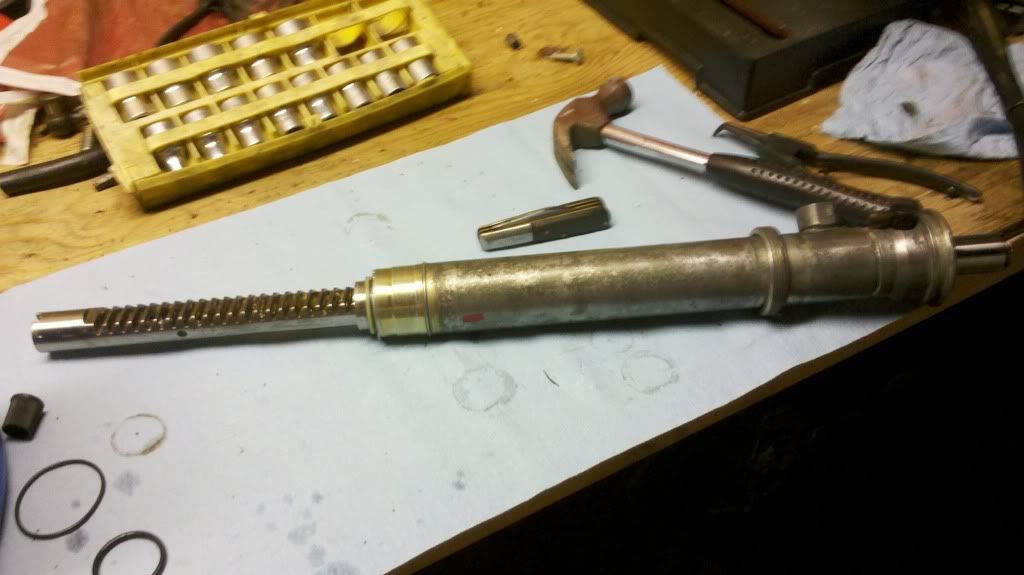
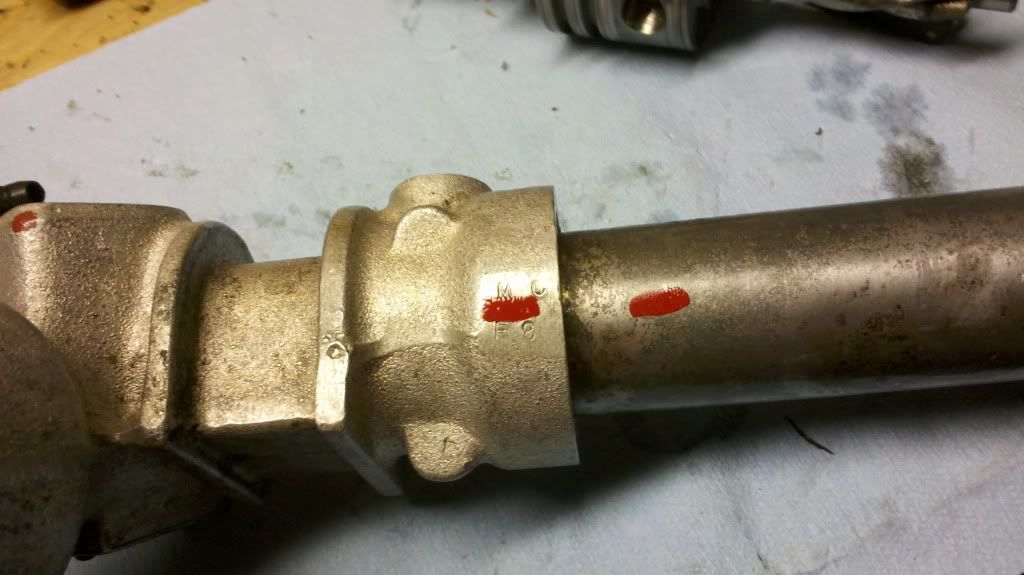
The rack was removed from the car and cleaned of all grime.
Then the hard lines were removed
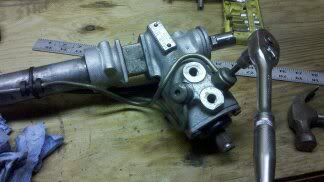
You may find that the bolts are frozen and rather than strip the allen socket you can use vice grips.
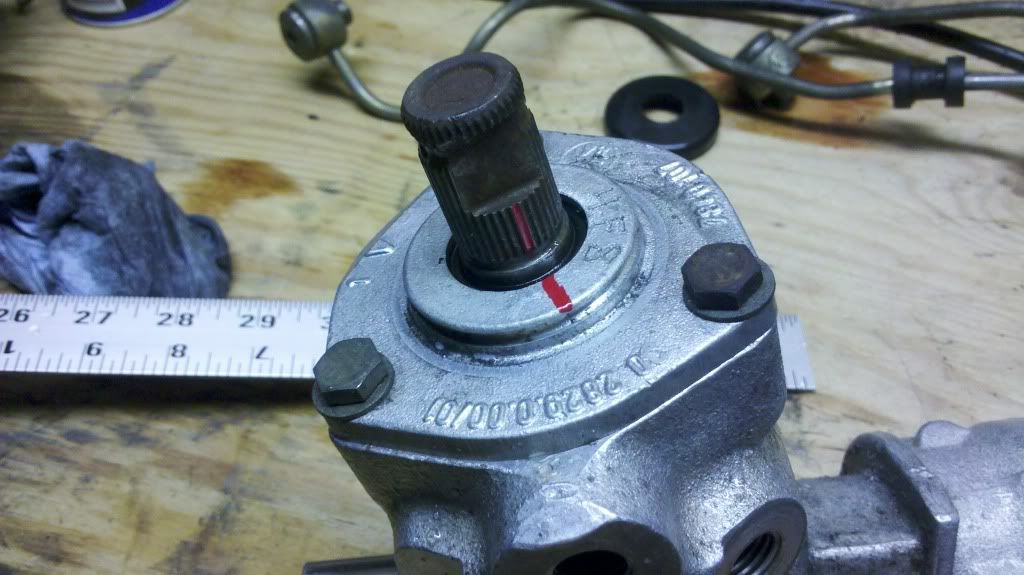
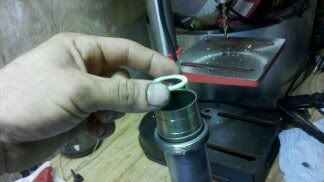
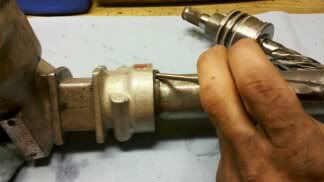
The next step is to remove the pinion box cap. Before you do this you must mark the relation of the cap to the steering box, and the relation of the pinion to the rack. I did the latter by first extending the gearbox side of the rack to an exact inch from the housing.
Then mark the relationship of the pinion shaft to the cap.
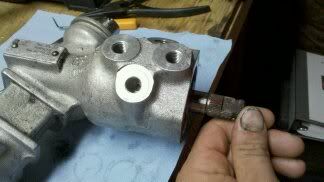
Now the cap and internals may be removed. You must lay things out in an order you can remember or tag them if need be. The direction the bearings and races must remain the same on assembly.
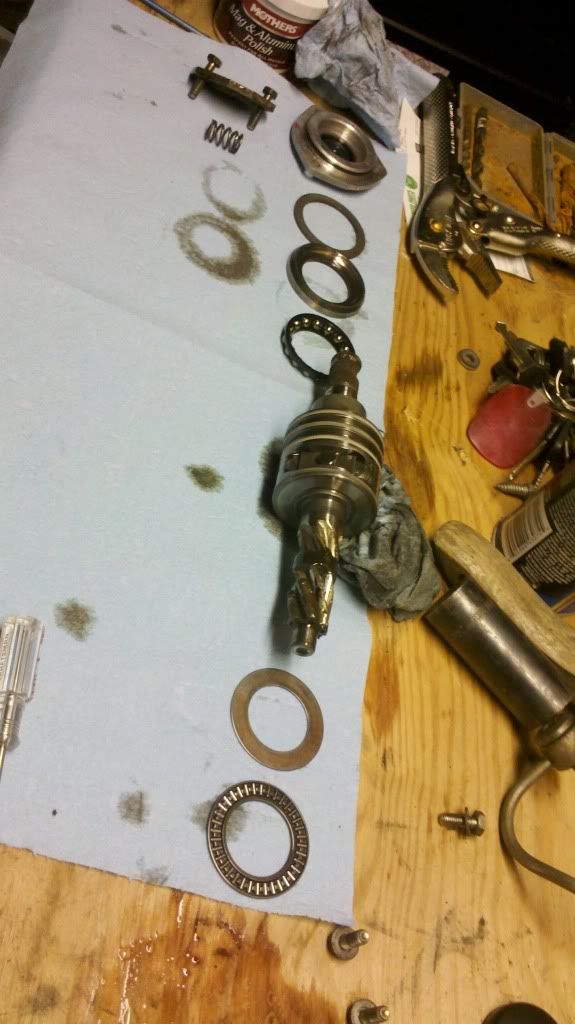
Next remove the cap spring and plunger from the bottom of the pinion box, again marking and organizing your parts.
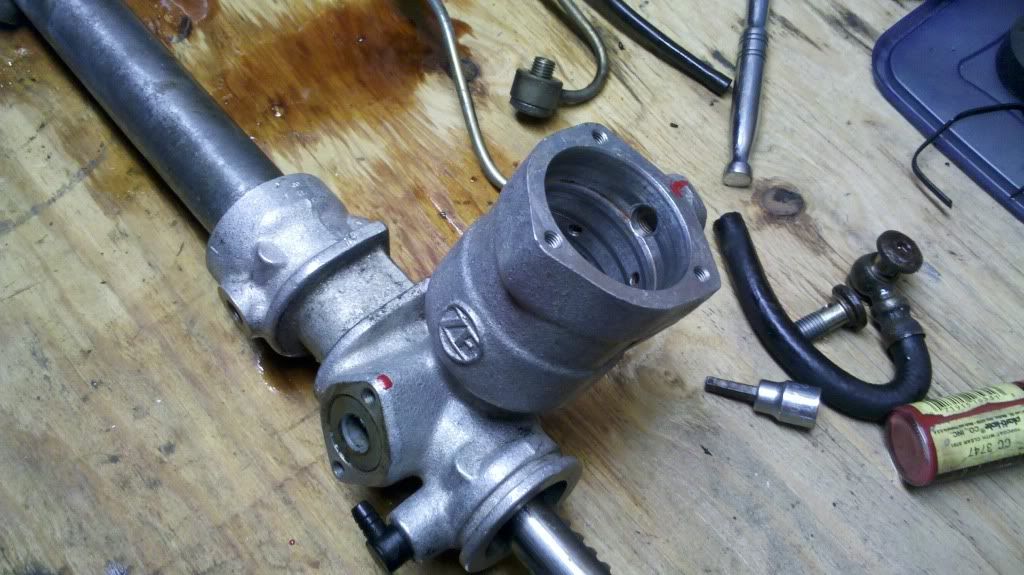
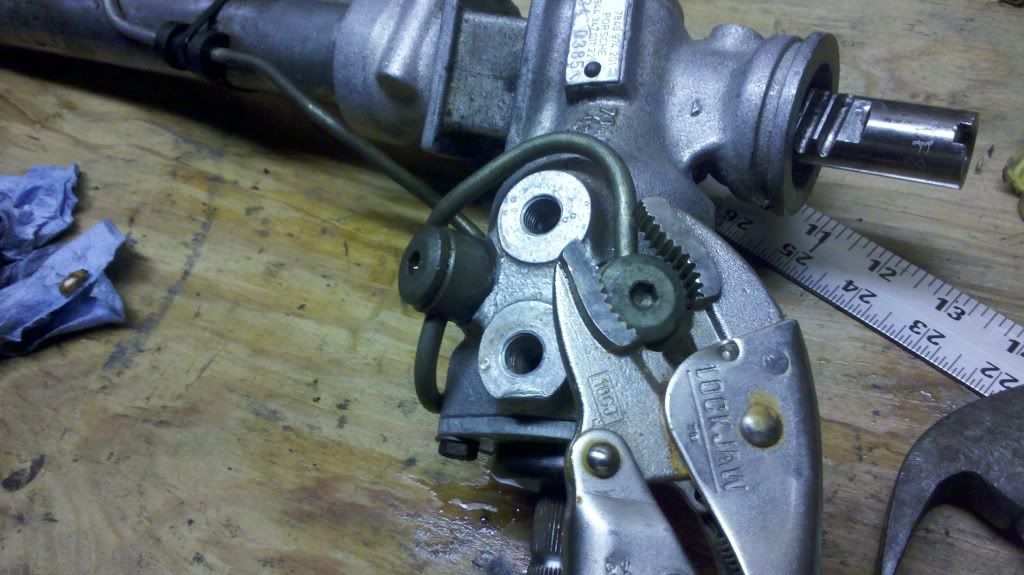
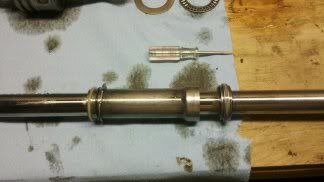
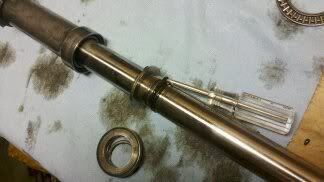
mark the relation of the rack tube to pinion box.
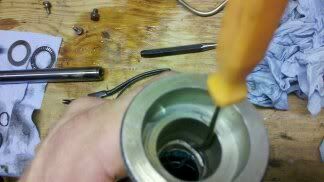
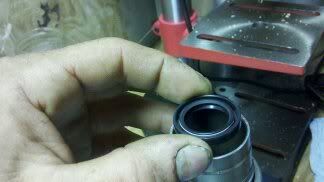
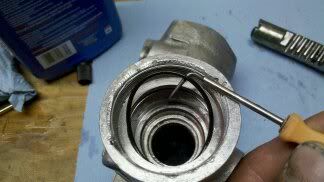
the two parts are held together with a ring. The proper tool to remove the ring is a spanner, but if you dont have one handy a punch can be used. take care not to damage the threads.
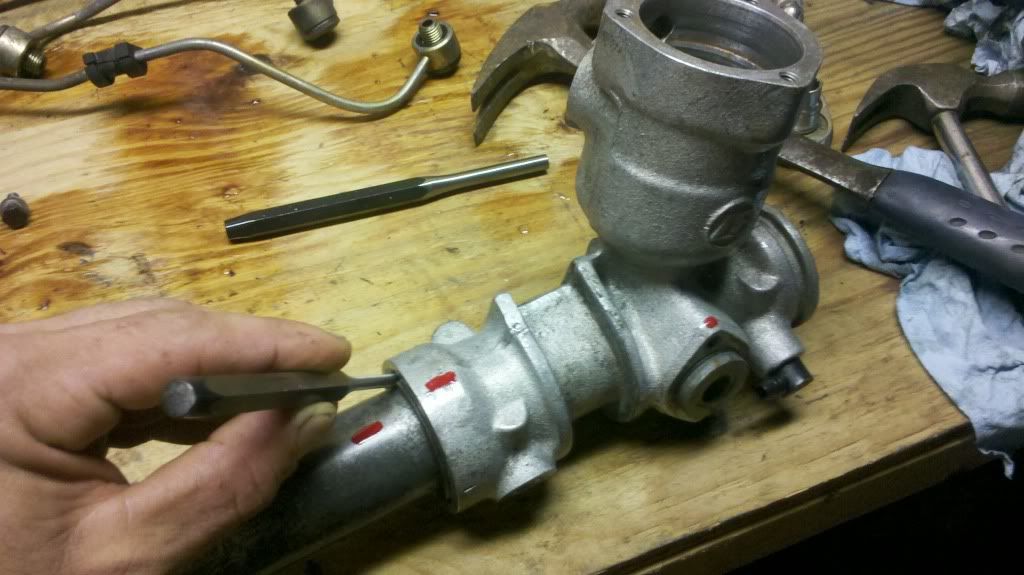 here is a shot of the two halves seperated. here is a shot of the two halves seperated.
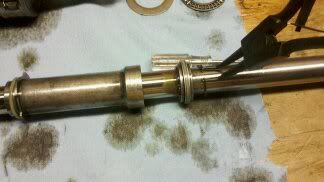
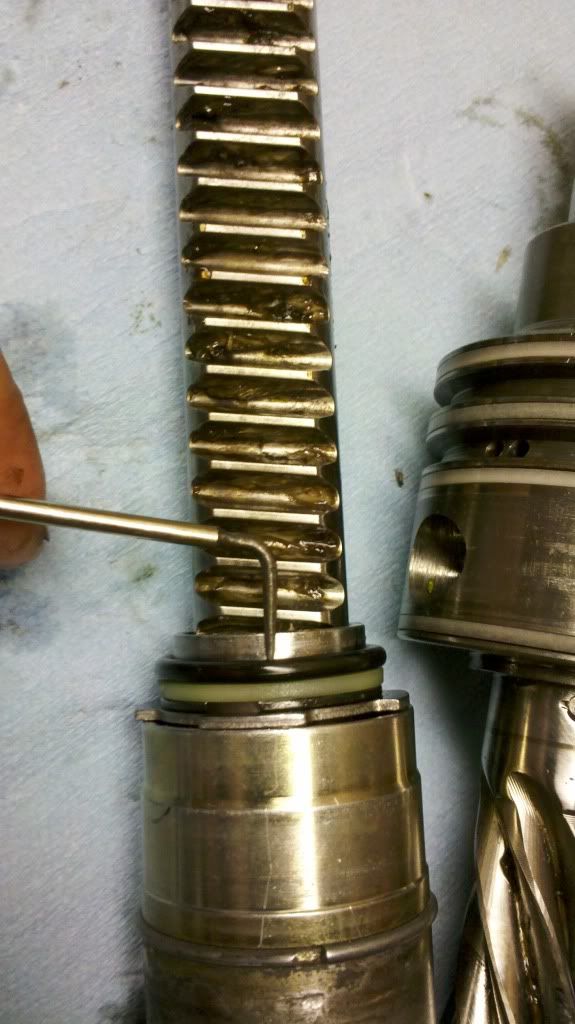
Inside you will find the rack rod itself with a sliding steel collar on it. the collar contains one of the two wiper seals. To remove it you must first remove a series of snap rings, spacers, seal, and o rings. It is imperative that you record the order of these parts.
 [/"] [/"]
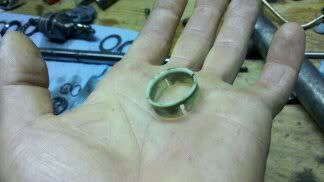
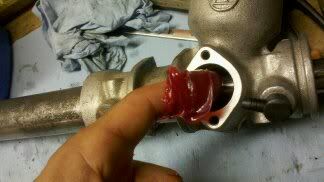
one of the two o rings under the rack piston ring was damaged. I replaced both o rings with ones from the local hardware specialty bins.
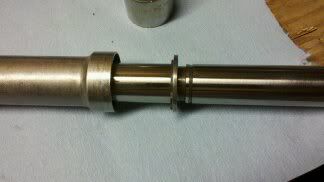
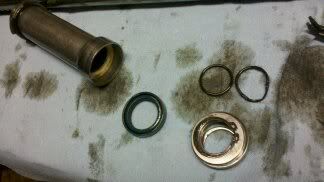
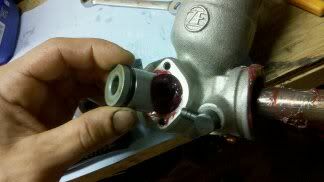
After sliding the tube off the rack pry the seal out. The below pic shows the removed seal off the tube and the damaged o rings from under the rack piston ring. Note that there is a nylon spacer behind the right seal in the tube. Keep in mind the direction as the fit is specific.
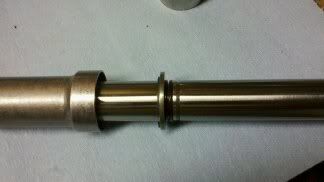
The next order of business is to remove the passenger side wiper seal from the rack tube. First a nylon bushing MUST be removed in order to drive the seal out. The below pic shows the bushing in front of the damaged seal.
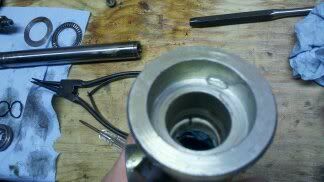
The bushing can be carefully worked out with a pic. This is a very serious task not to break the bushing, because if you do you will need to buy a complete rebuild kit to get a new one. Be patient and very gentile.
Now use a seal driver or socket of the apropriate size to drive the seal from its bore. Note that there is a plastic spacer in front of the seal.
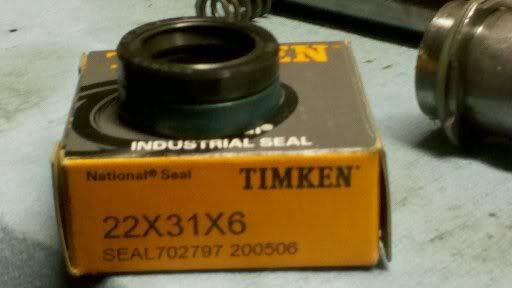
the wiper seals are sized mm 22x31x6.5
I got replacement seals from a local bearing and seal supplier. The 6.5 width is hard to find but 6 does fine. They cost me 6 dollars and some change each.
The drivers side seal goes in to the rack sleeve as pictured, with the spring facing up and the nylon washer on the inside. be careful how you drive it in, using a driver or socket that fits the bore so the inner seal lip is not damaged.
When installing the passenger side wiper seal remember that the nylon washer goes in first, followed by the seal.
As you drop the seal in it will most likely flip over on the way to the bottom so it may take several tries to get it facing the right way. The spring lip side of the seal must face up, or towards the drivers side of the rack tube.
Again make sure to use a seal driving tool that fits the OD of the seal so as not to damage it.
After driving the seal in check from the other end of the tube with your finger to see if the plastic washer wiggles. it should not. If it wiggles the seal is not seated.
 [/quote] [/quote]
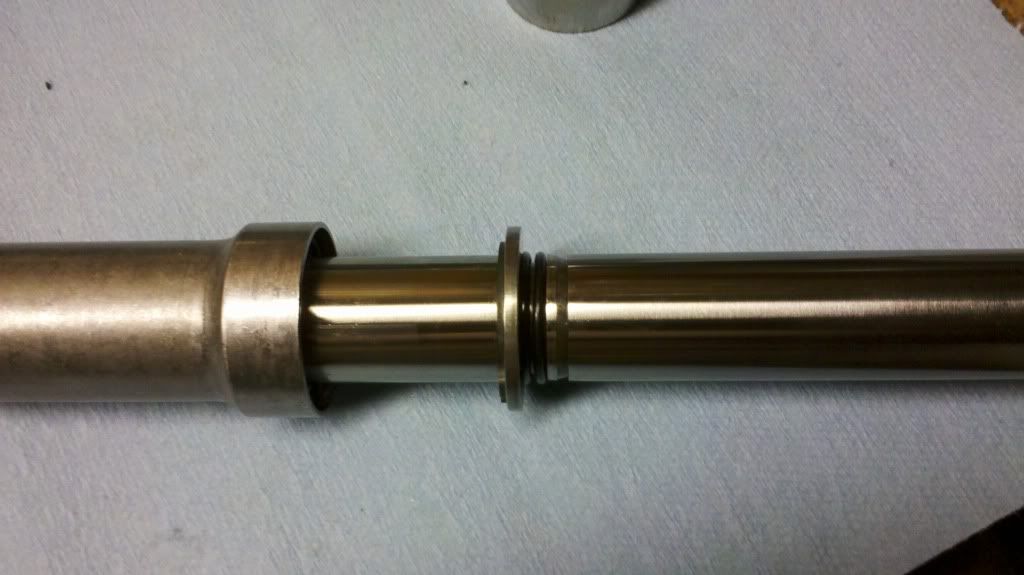
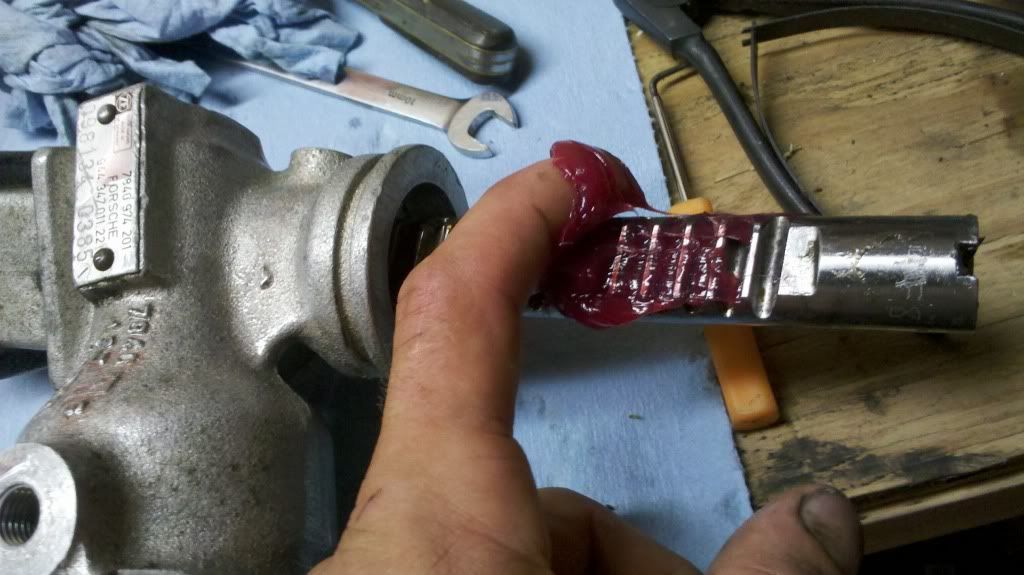
After installing the seals, oil the rack and seals with merc dex III and slide the metal sleeve back on the rack the way it came off taking care not to damage the seal lip on the sharp grooves in the middle of the rack. install the o rings, snap rings, washers and rack piston ring in the following order; left snap ring, left washer, twin o rings, rack piston ring (washer with the nylon core), right washer, right snap ring.
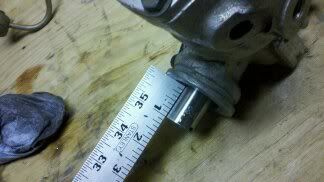
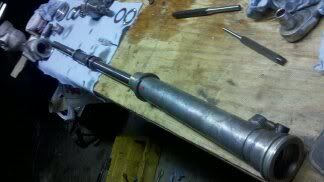
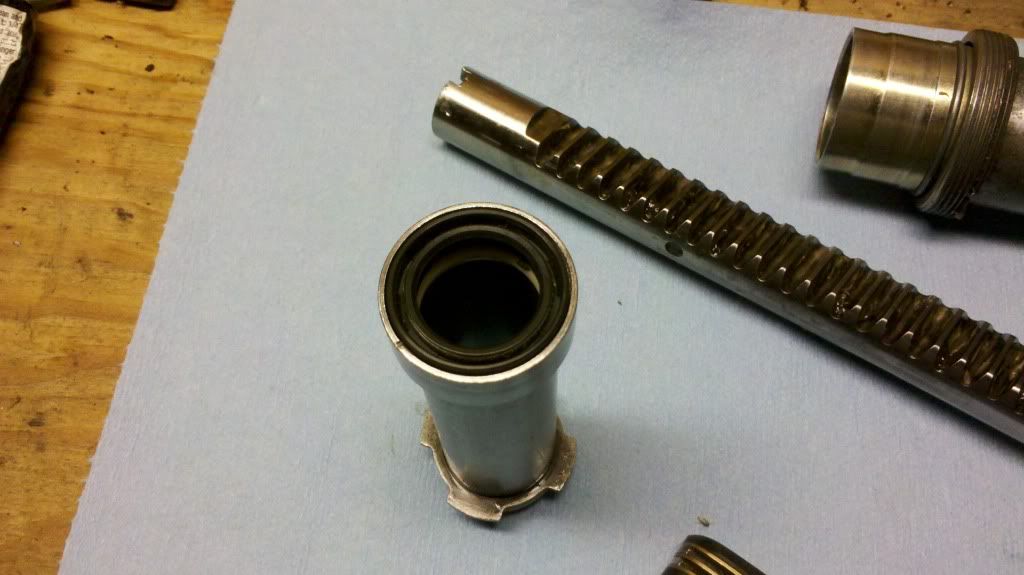
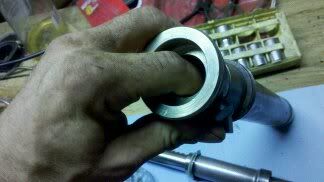
Then slide the rack back into the rack tube, it should look like this.
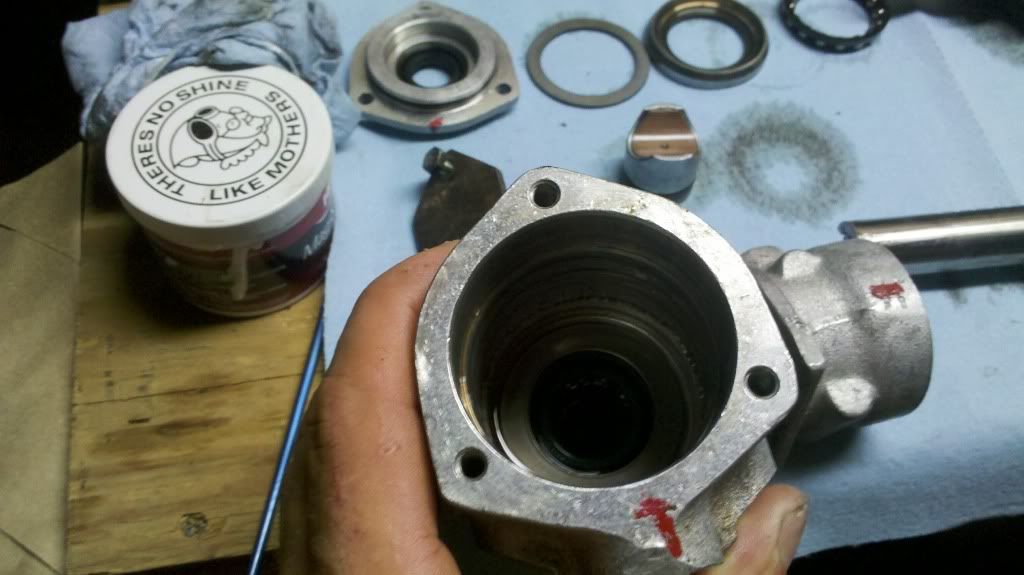
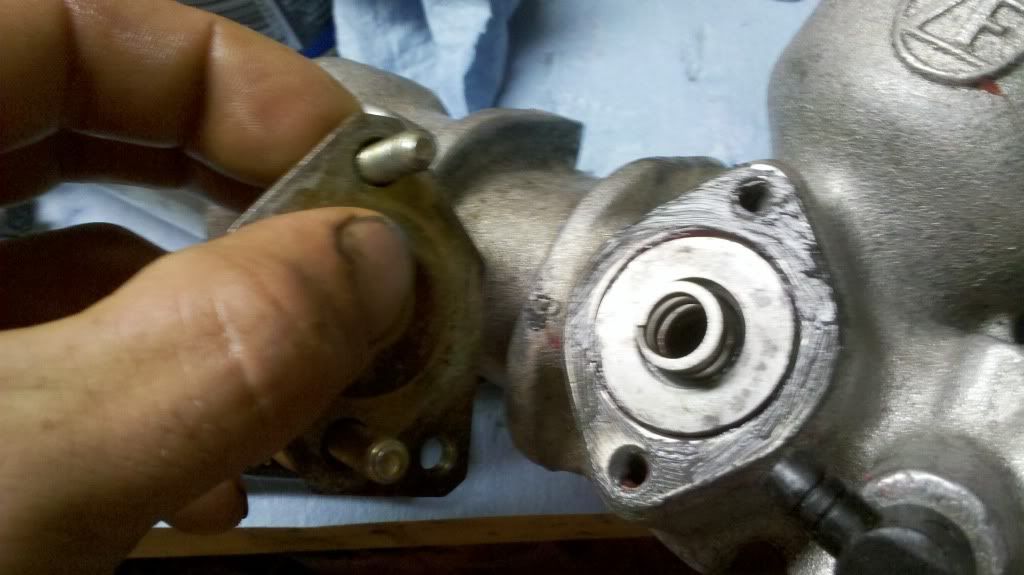
Check the o rings that seal the tube to gearbox union for damage and need of replacement.
My o rings were fine. In fact they looked brand new so I left them be. In fact the only o rings I replaced were the two under the rack piston ring and the 4 on the external hard lines. All of them came from the hardware store for a few bucks.
The only seals left are the upper and lower pinion seals and the pinion box cap o ring. An upper seal leak will result in the top of the gearbox getting drenched, while a lower seal leak will result in the drivers side rack boot filling with power steering fluid. These seals have a very low speed, low friction, low heat life and will last a long time. The upper seal can be exposed to corrosion around the OD and grit wearing the ID, but if the top rubber cap is not cracked or missing these are unlikely events. The lower seal is quite protected from the elements and very unlikely to fail. I did not replace these seals as they did not leak and had sharp pliable lips with no cracks. If you do decide to replace them you will need a seal puller for the lower seal.
Below shows the lower seal in the bottom of the gearbox, and the upper seal and o ring on the cap in the background.
After inspecting and lubing all seals and o rings slide the rack and tube back into the pinion housing line up the paint marks and tighten the threaded ring. I cant tell you how tight, I just hammered it till it stopped turning.
Extend the drivers side rack one inch from the housing and install the races bearings pinion and valve assembly . (Less complicated than it sounds.) make sure to install the pinion shaft with the mark you made facing in the proper direction. If I remember right i had to install everything from the side to keep the bearings from falling off the valve assembly.
Once the pinion/valve assembly is seated install the cap and make sure the marks line up. If they do not you will have to remove the pinion and turn it a tooth whichever direction it needs to be.
the only thing left is greasing the rack teeth and pinion gear, and installing the plunger, spring and cap on the bottom of the housing
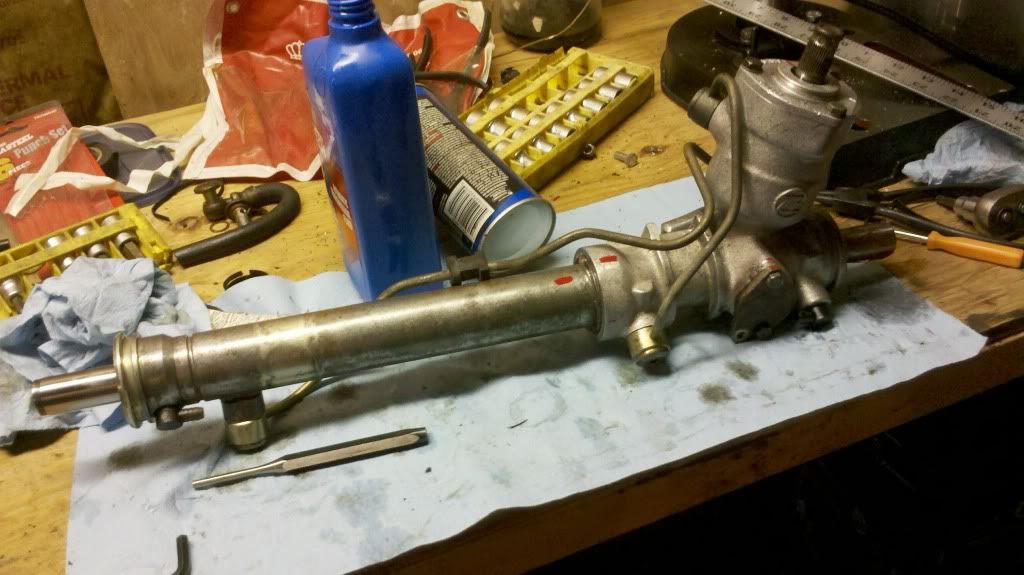
Install hard lines and you are done.
_________________
87 924s
88 924SE gone
447 hp cgt clone
87 924S gone
84 944 sold
83 944 sold
89 turbo S LSD, ABS etc
86 951 white rocket
85 944 sport everything.
84 944 sold.
87 944 sold
Last edited by joecitizennn on Sat Sep 03, 2011 4:06 am; edited 1 time in total |
|
| Back to top |
|
 |
Rasta Monsta

Joined: 12 Jul 2006
Posts: 11723
Location: PacNW
|
| Posted: Sat Sep 03, 2011 3:59 am Post subject: |
|
|
Nice work, man. . .you put together some quality How-Tos.
_________________
Toofah King Bad
- WeiBe (1987 924S 2.5t) - 931 S3
|
|
| Back to top |
|
|
joecitizennn
Joined: 12 Sep 2005
Posts: 2096
Location: no mans land
|
| Posted: Sat Sep 03, 2011 4:07 am Post subject: |
|
|
thanks, it may be a while before I edit all the errors out of the post, im a little crosseyed..
_________________
87 924s
88 924SE gone
447 hp cgt clone
87 924S gone
84 944 sold
83 944 sold
89 turbo S LSD, ABS etc
86 951 white rocket
85 944 sport everything.
84 944 sold.
87 944 sold |
|
| Back to top |
|
|
ideola

Joined: 01 Oct 2004
Posts: 15548
Location: Spring Lake MI
|
| Posted: Sat Sep 03, 2011 4:37 am Post subject: |
|
|
+1 to Rasta's comment. Great writeup and pix, top work Joe.
_________________
erstwhile owner of just about every 924 variant ever made |
|
| Back to top |
|
|
joejax
Joined: 02 Dec 2009
Posts: 919
Location: Jacksonville,FLA,USA
|
| Posted: Sat Sep 03, 2011 8:43 am Post subject: |
|
|
+10  This is the definition of a 'how to'. Great work. This is the definition of a 'how to'. Great work.
_________________
I got nothin'
Uhhh...you got any pics? |
|
| Back to top |
|
|
tyfighter123

Joined: 19 Jan 2010
Posts: 551
Location: Colorado
|
| Posted: Sat Sep 03, 2011 9:29 am Post subject: |
|
|
Awesome write up! Now whats your next one going to be! The more the better for nobbi's like myself.
_________________
Porsche 924 1977 N/A
Mustang GT/CS 2007
Porsche 924S 1987 (parts car)(cut up and recycled)
Porsche 911S 1976
Porsche 931 1980
Porsche 931 1980 (parts car) |
|
| Back to top |
|
|
bnoon
Joined: 12 Oct 2009
Posts: 607
Location: West Des Moines, IA USA
|
| Posted: Wed Sep 14, 2011 12:29 am Post subject: |
|
|
Nice writeup and good timing for me too. I've got 3 racks to rebuild that I got from Ebay already disassembled. Should make it a ton easier. X 1000 thanks!!!
_________________
'80 924 Turbo - SOLD!
1986 Porsche 944 Turbo - SOLD!
Porscheless  |
|
| Back to top |
|
|
|
|
You cannot post new topics in this forum
You cannot reply to topics in this forum
You cannot edit your posts in this forum
You cannot delete your posts in this forum
You cannot vote in polls in this forum
|
Powered by phpBB © 2001, 2005 phpBB Group
|

